
How to Use Proxy in Browser?

Since you ended up here, chances are you’re not looking for information on proxies because you’re fascinated with the finer points of networking. Neither am I. Rather, I use proxies to have more control over the things my browser exposes, and to get past annoying limitations inherent to using a single IP address.
So if you’re wondering how to use proxy in browser environments like Chrome or Firefox for practical business and personal needs, look no further. Here’s everything you need to know, explained step by step.
What Are Proxies?
I get asked this a lot by digital marketing and SEO newbies, along with data analysts faced with the limitations of barebones data gathering. So, here’s a quick intro.
Proxies are go-betweens that handle website requests on your behalf. Let’s say your Houston-based company wants to open a store in Phoenix. Ordinarily, checking up on the competition would either reveal their general prices or those local to you. Using a proxy lets you see any special offers or discrepancies only available to Phoenix customers and create a strategy to become competitive right away.
For this to work, you turn on a proxy and start doing your research. The proxy takes your requests, forwards them to websites using a Phoenix IP address, and then returns the results Phoenix residents see. Your original IP address and location remain invisible.
Why use a web proxy?
That’s just one out of dozens of scenarios where a proxy makes sense. Schools and companies use them to restrict access to unwanted sites. Developers use them to test how websites display in different locations or when debugging. If you’re as concerned about privacy as I am, you might get a proxy to route browser traffic without affecting other programs.
Either way, you’ll first need to learn how to use a web proxy. It might sound intimidating if you’re not used to dealing with tech all the time. I’ll walk you through everything, so there shouldn’t be any trouble.
How to Use a Proxy in Standard Browsers
Setting up a proxy in different browsers is relatively straightforward. The process is similar for all the most popular browsers, but there are subtle differences that might trip you up. That’s why I decided to split this part up into four sections. The first, third, and fourth are universal, while the second goes into specifics for each mainstream browser.
Getting a proxy
Regardless of your browser of choice, the first thing you need is a good provider and credentials for the type of proxy you’ll be using.
A classic mistake I keep seeing is people utilizing proxy websites that offer free proxies while also claiming complete privacy and anonymity. The only scenario I can think of in which this could be a good idea is if you’re completely new to proxies and want to get a feel for how they work. I’d think twice even then, since such sites are notorious for keeping activity logs and spreading malware.
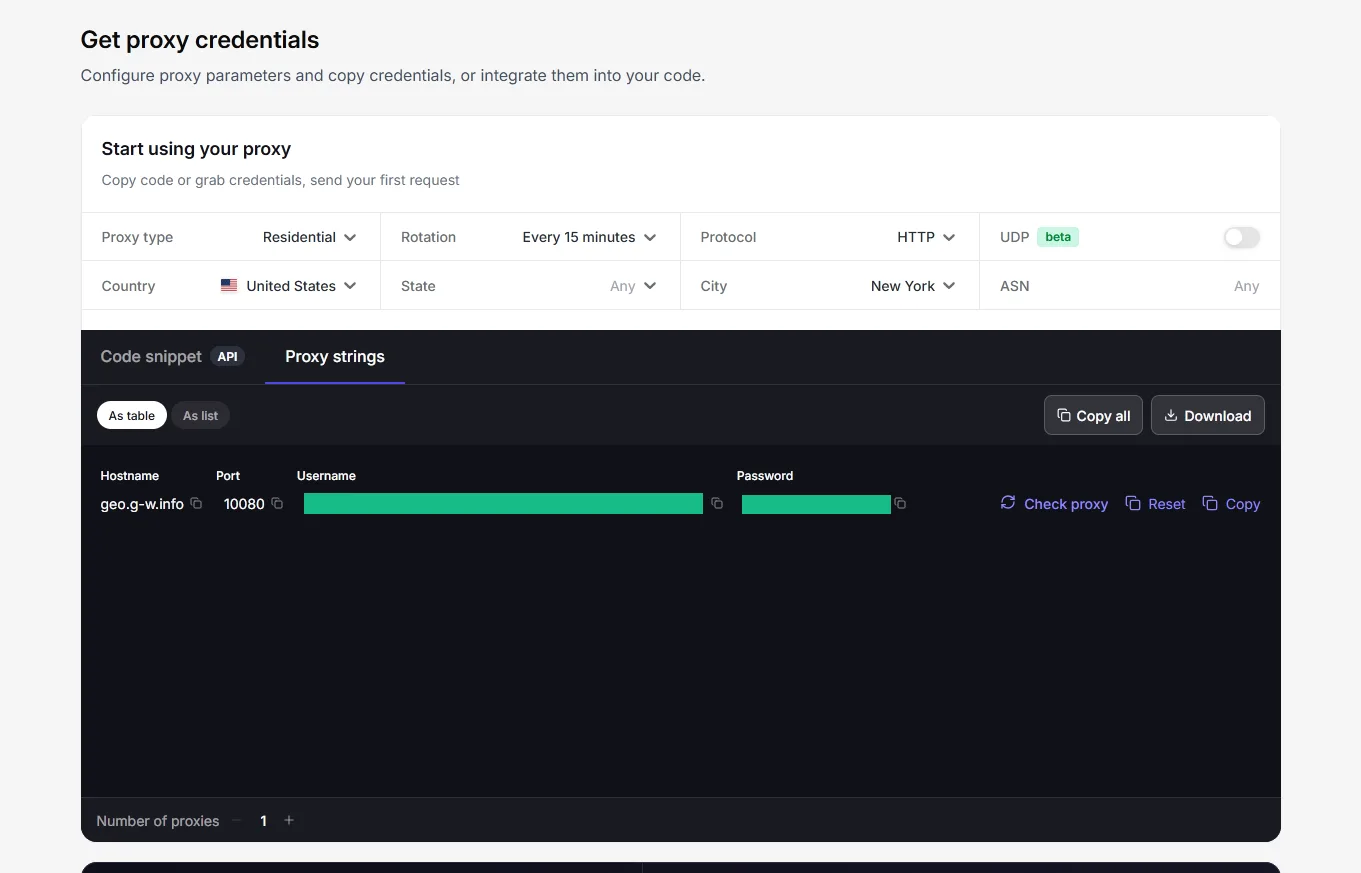
You’ll want to go with a reputable provider instead. Floppydata is my go-to, as mentioned on several occasions. Here, I’ve set up a rotating residential US HTTP proxy based in New York City. We’ll need the provided hostname, port, and login credentials shortly.
Accessing your browser’s proxy settings
With all the info you need in hand, it’s time to enable proxies for your browser. With a single exception, this boils down to navigating to a setting that enables proxies for the entire system. That’s where the final step in this section should take you.
Chrome
Let’s start with most people’s daily driver.
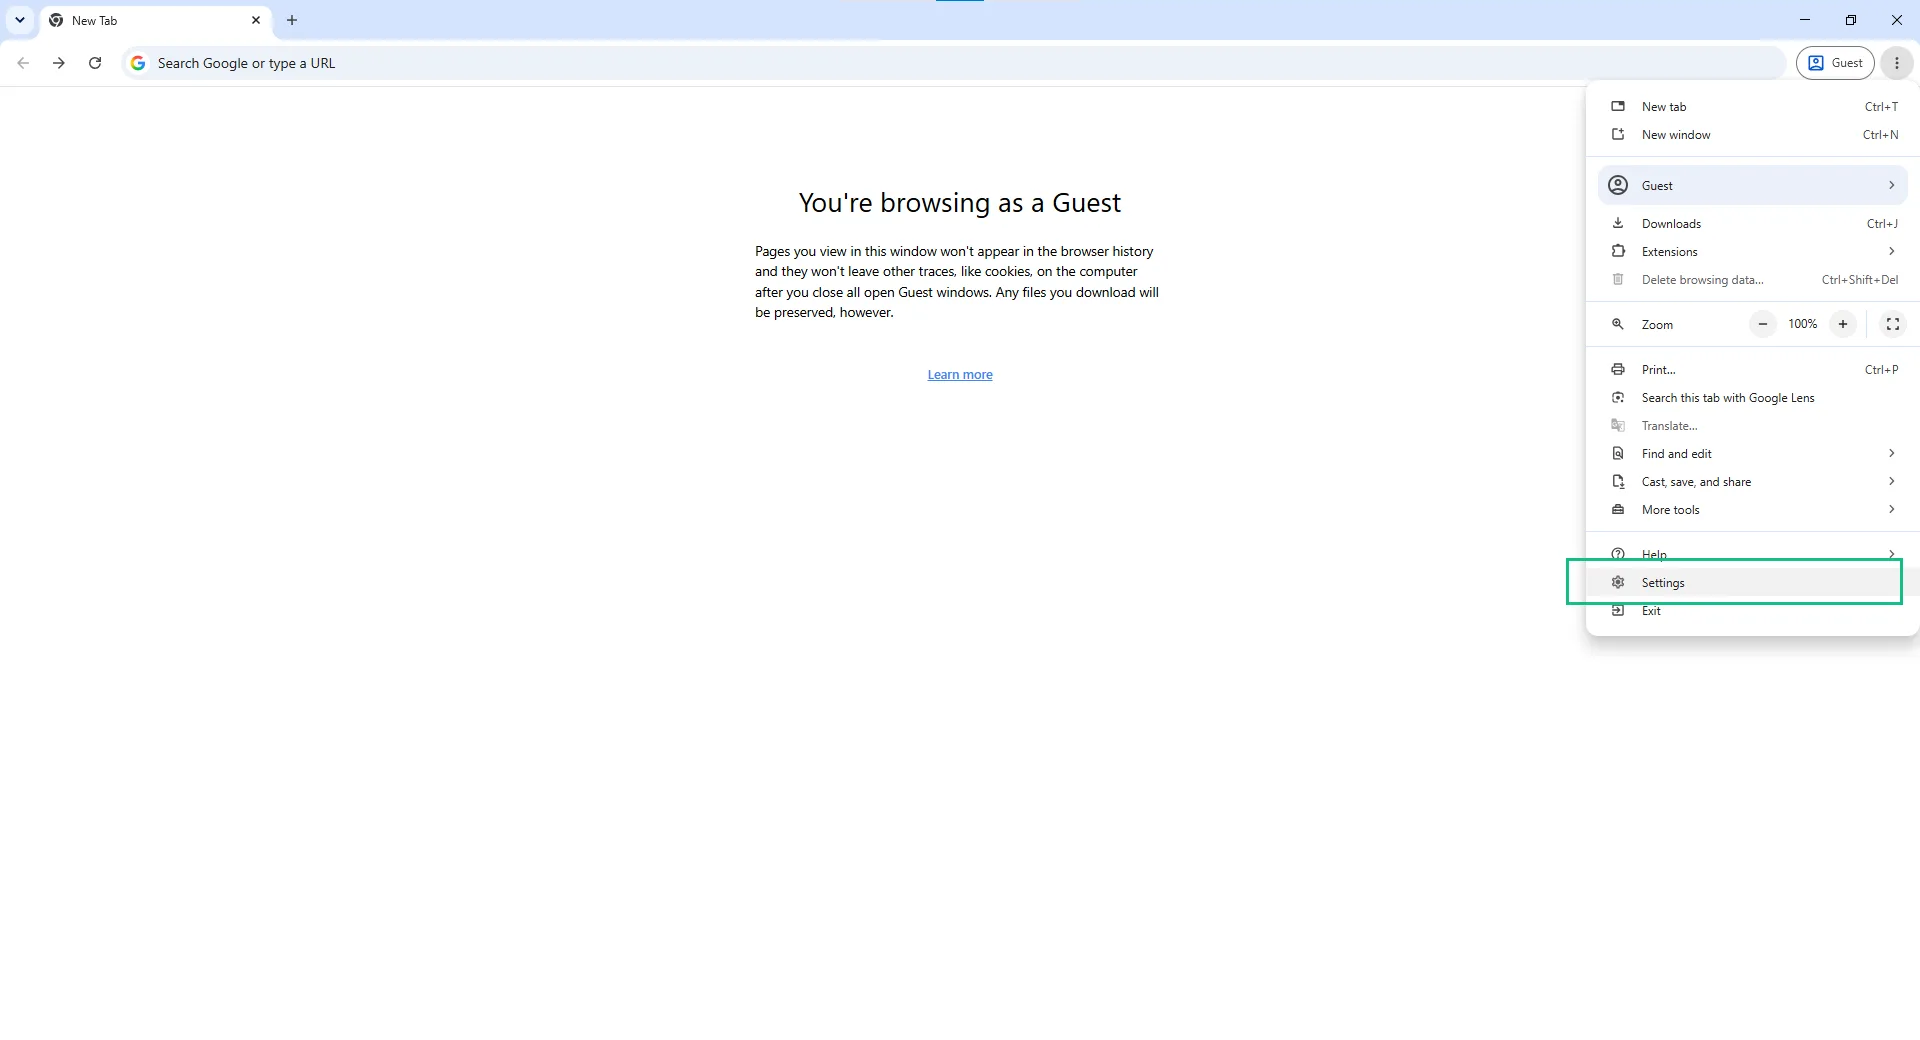
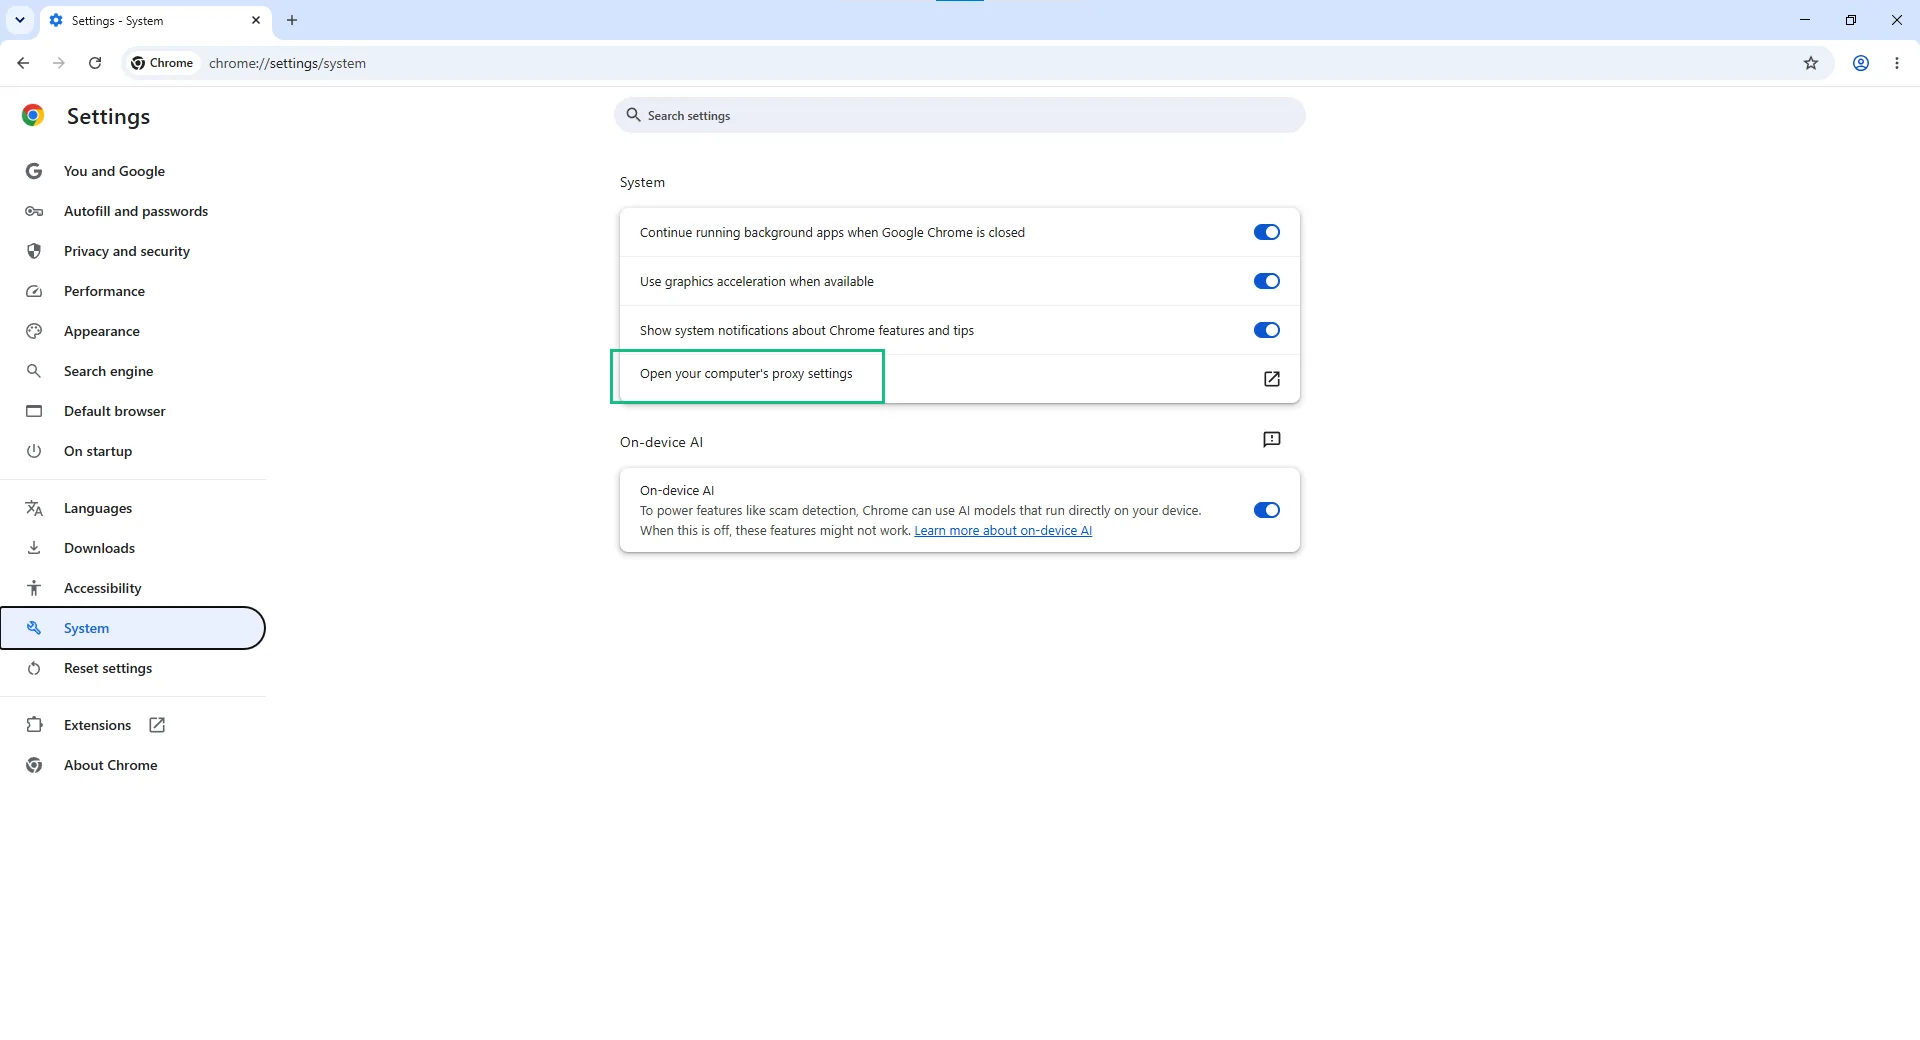
- Click on the three vertical dots in the top right corner and select Settings.
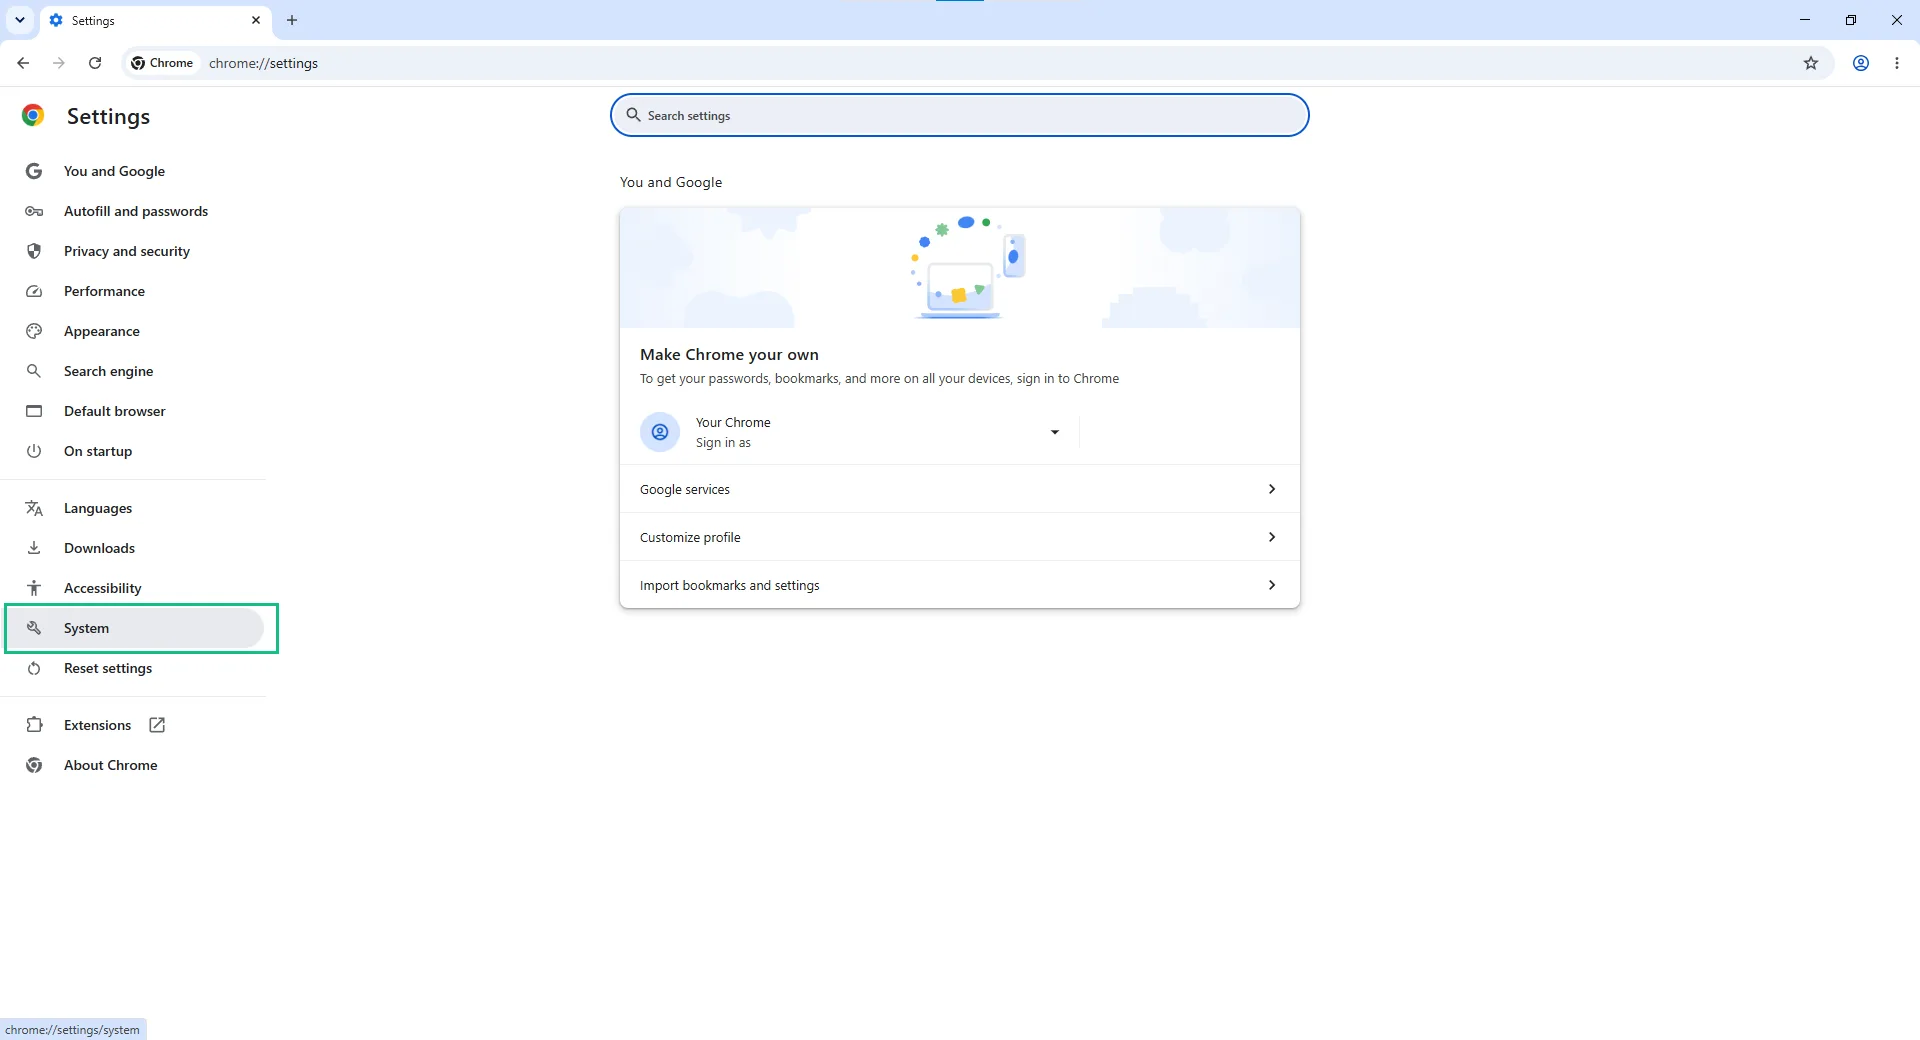
- Find and select the System tab.
- Select Open your computer’s proxy settings.
Microsoft Edge
Since Edge has been chromium-based for a while now, the same limitations apply.
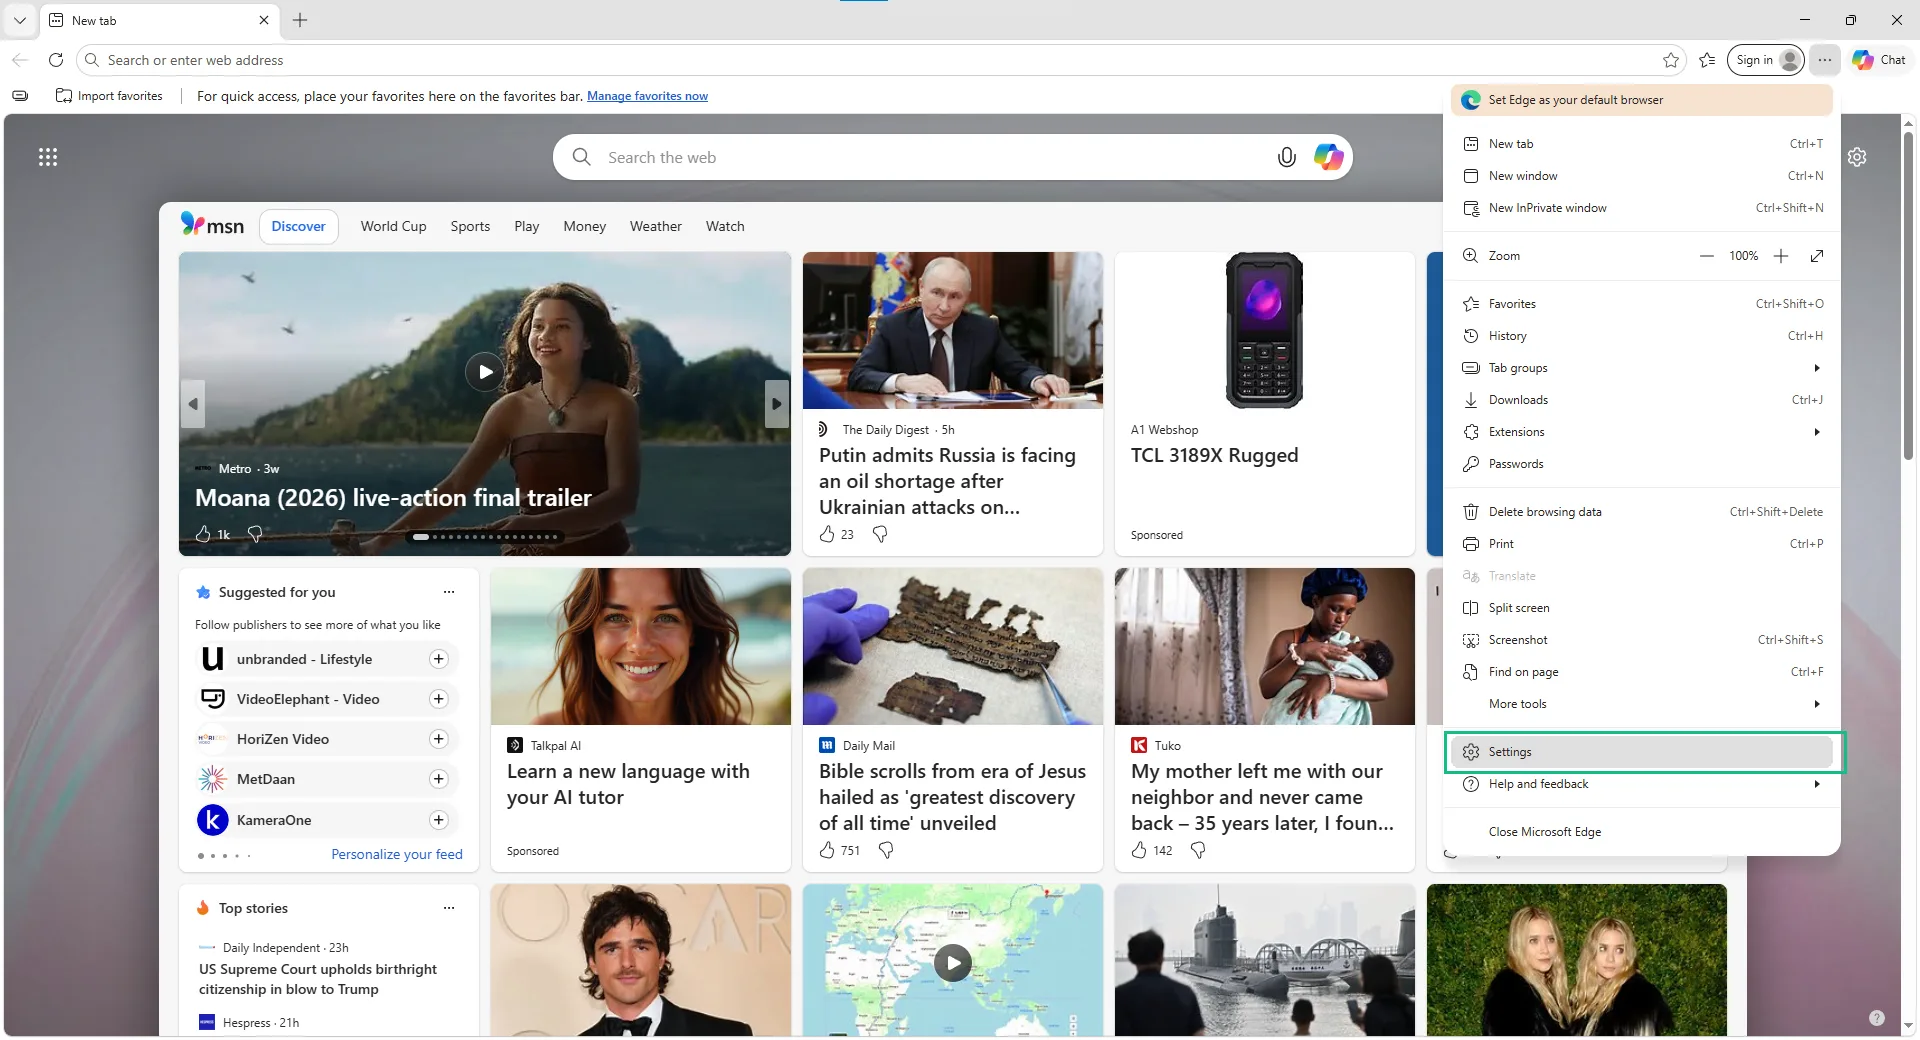
- Click the three horizontal dots in the upper right and choose Settings from the dropdown menu.
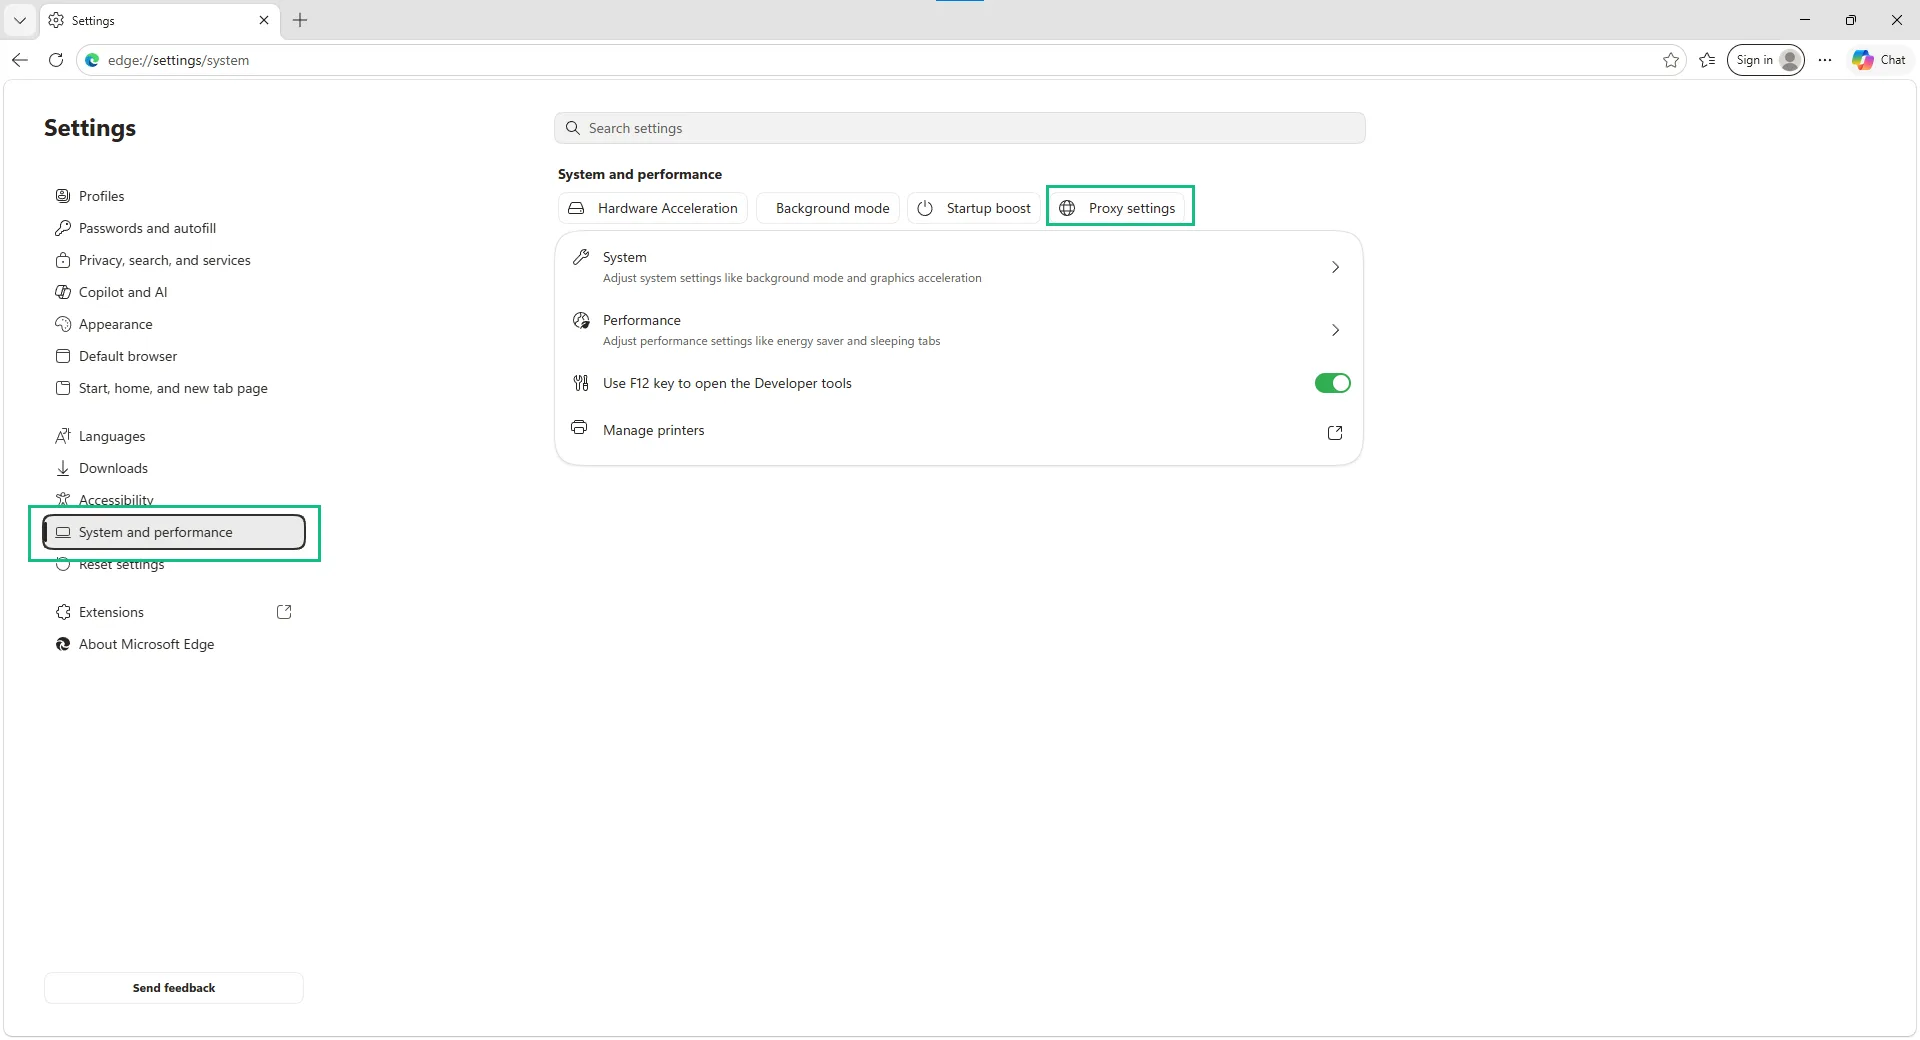
- Navigate to the System and performance tab. There, select Proxy settings.
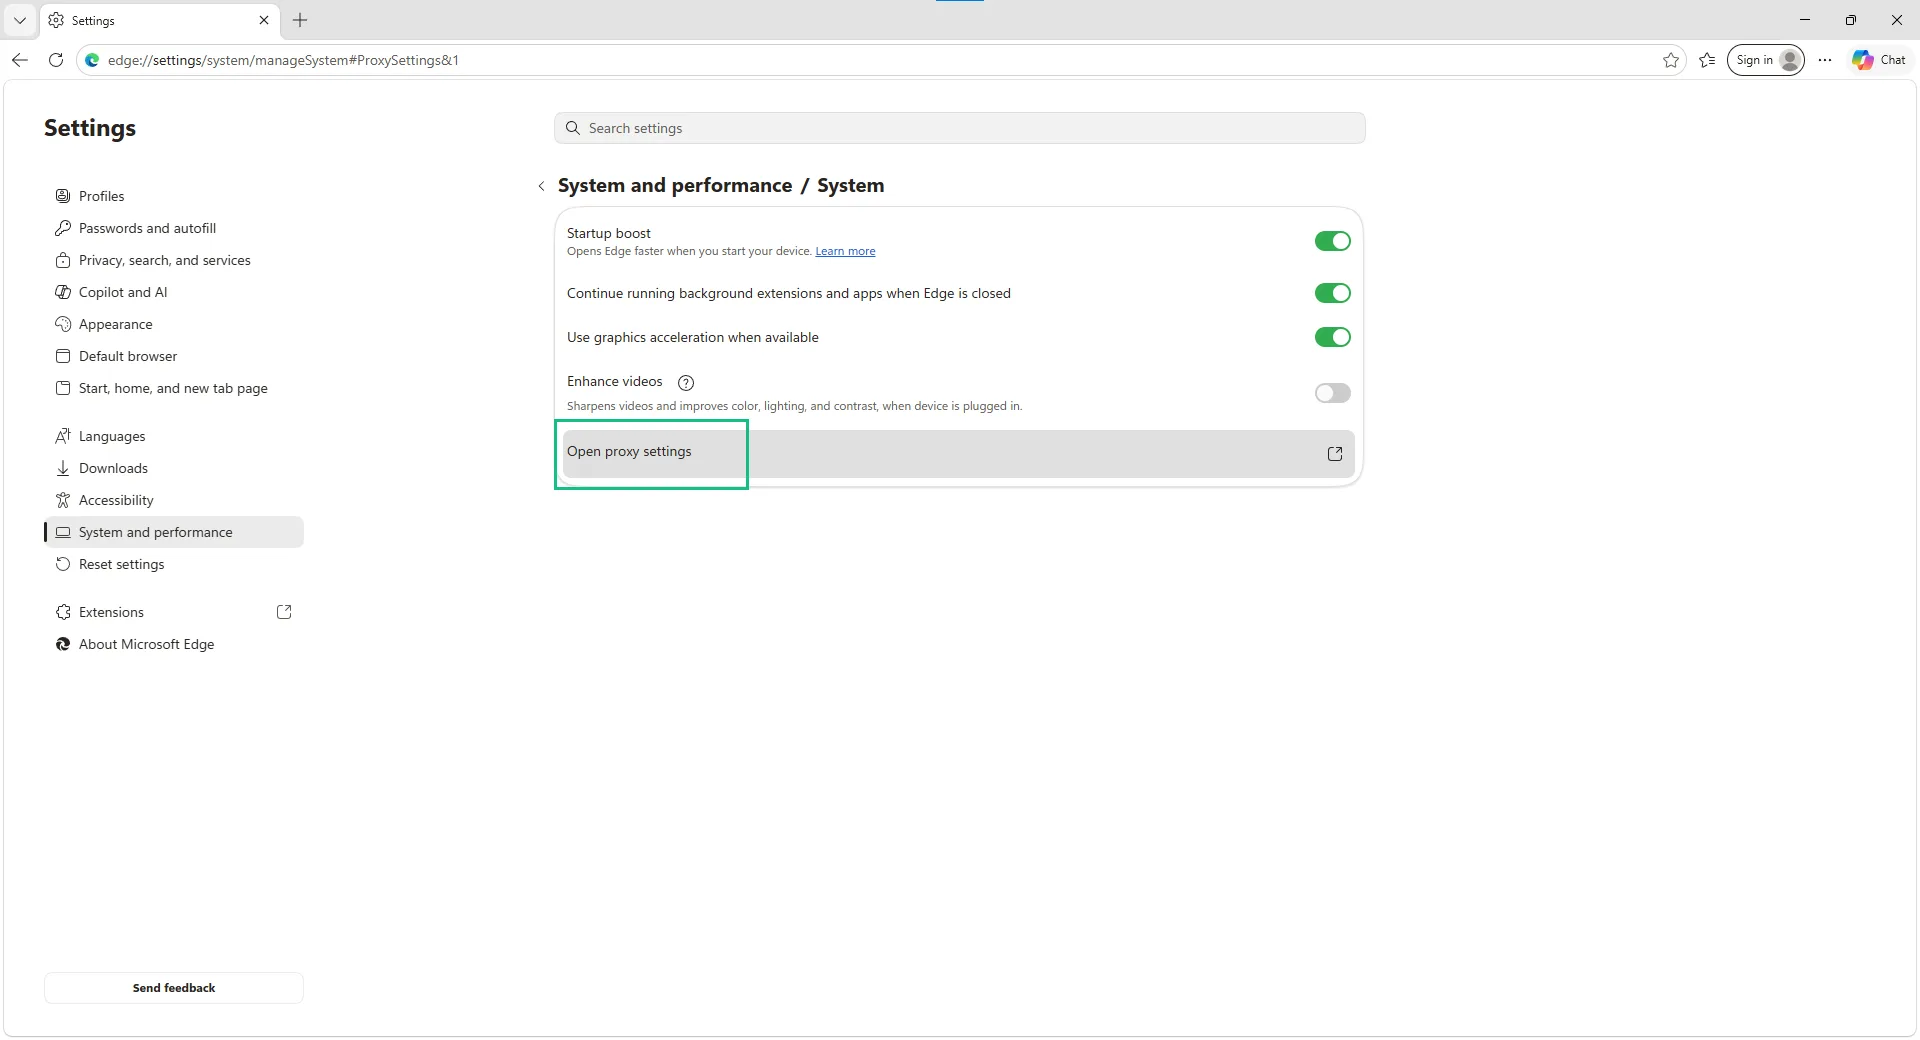
- Click Open proxy settings.
Safari
Despite its Apple exclusivity, Safari behaves similarly.
- Click on Safari on the top toolbar and choose Settings.
- Select Advanced, the right-most option,
- Find the small Proxies section and click on Change Settings.
Mozilla Firefox
Firefox is different in that you can actually have it use a proxy without affecting the rest of the system. Since there’s no real native SOCKS5 support in Windows, it’s also the best standard option for anyone wondering how to use SOCKS5 proxy without issues.
- Click on the hamburger menu in the top right and choose Settings.
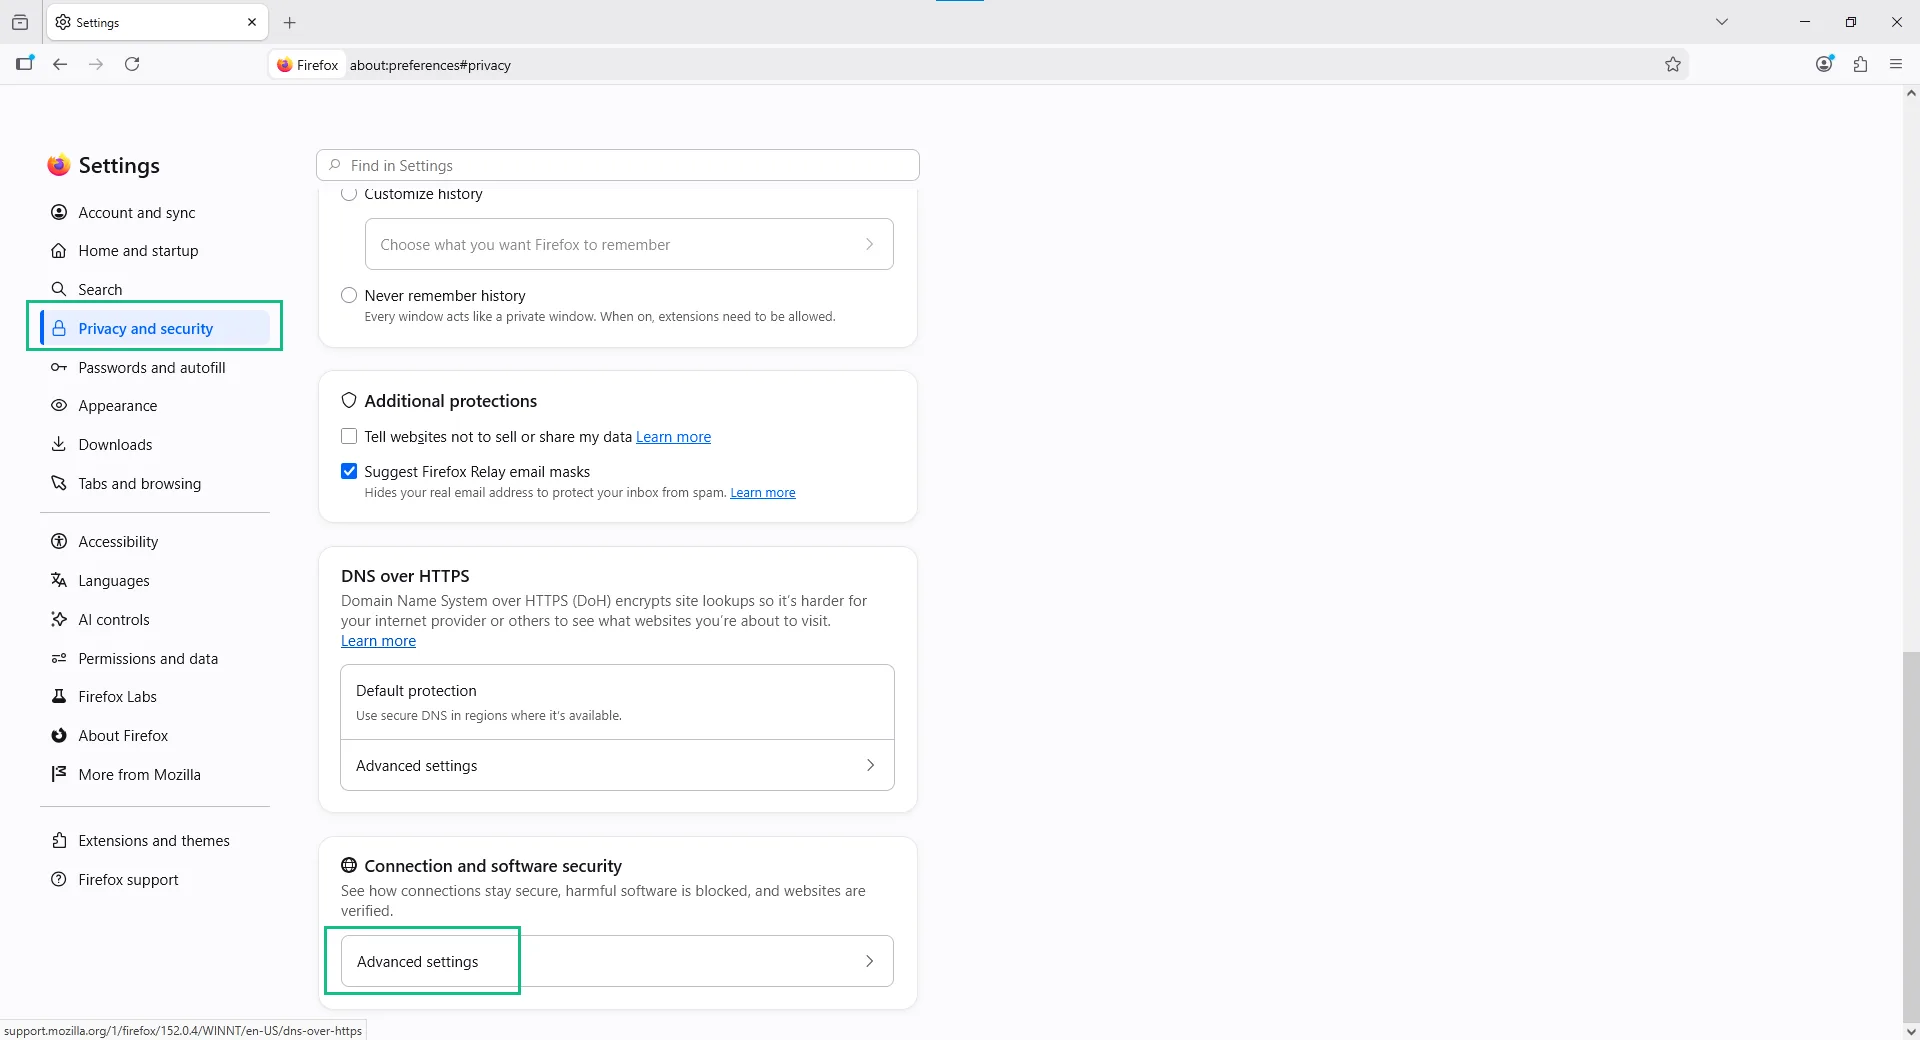
- Go to the Privacy and security tab and scroll all the way down until you see Connection and software security. Select Advanced settings.
- Select Configure proxy under Proxy settings.
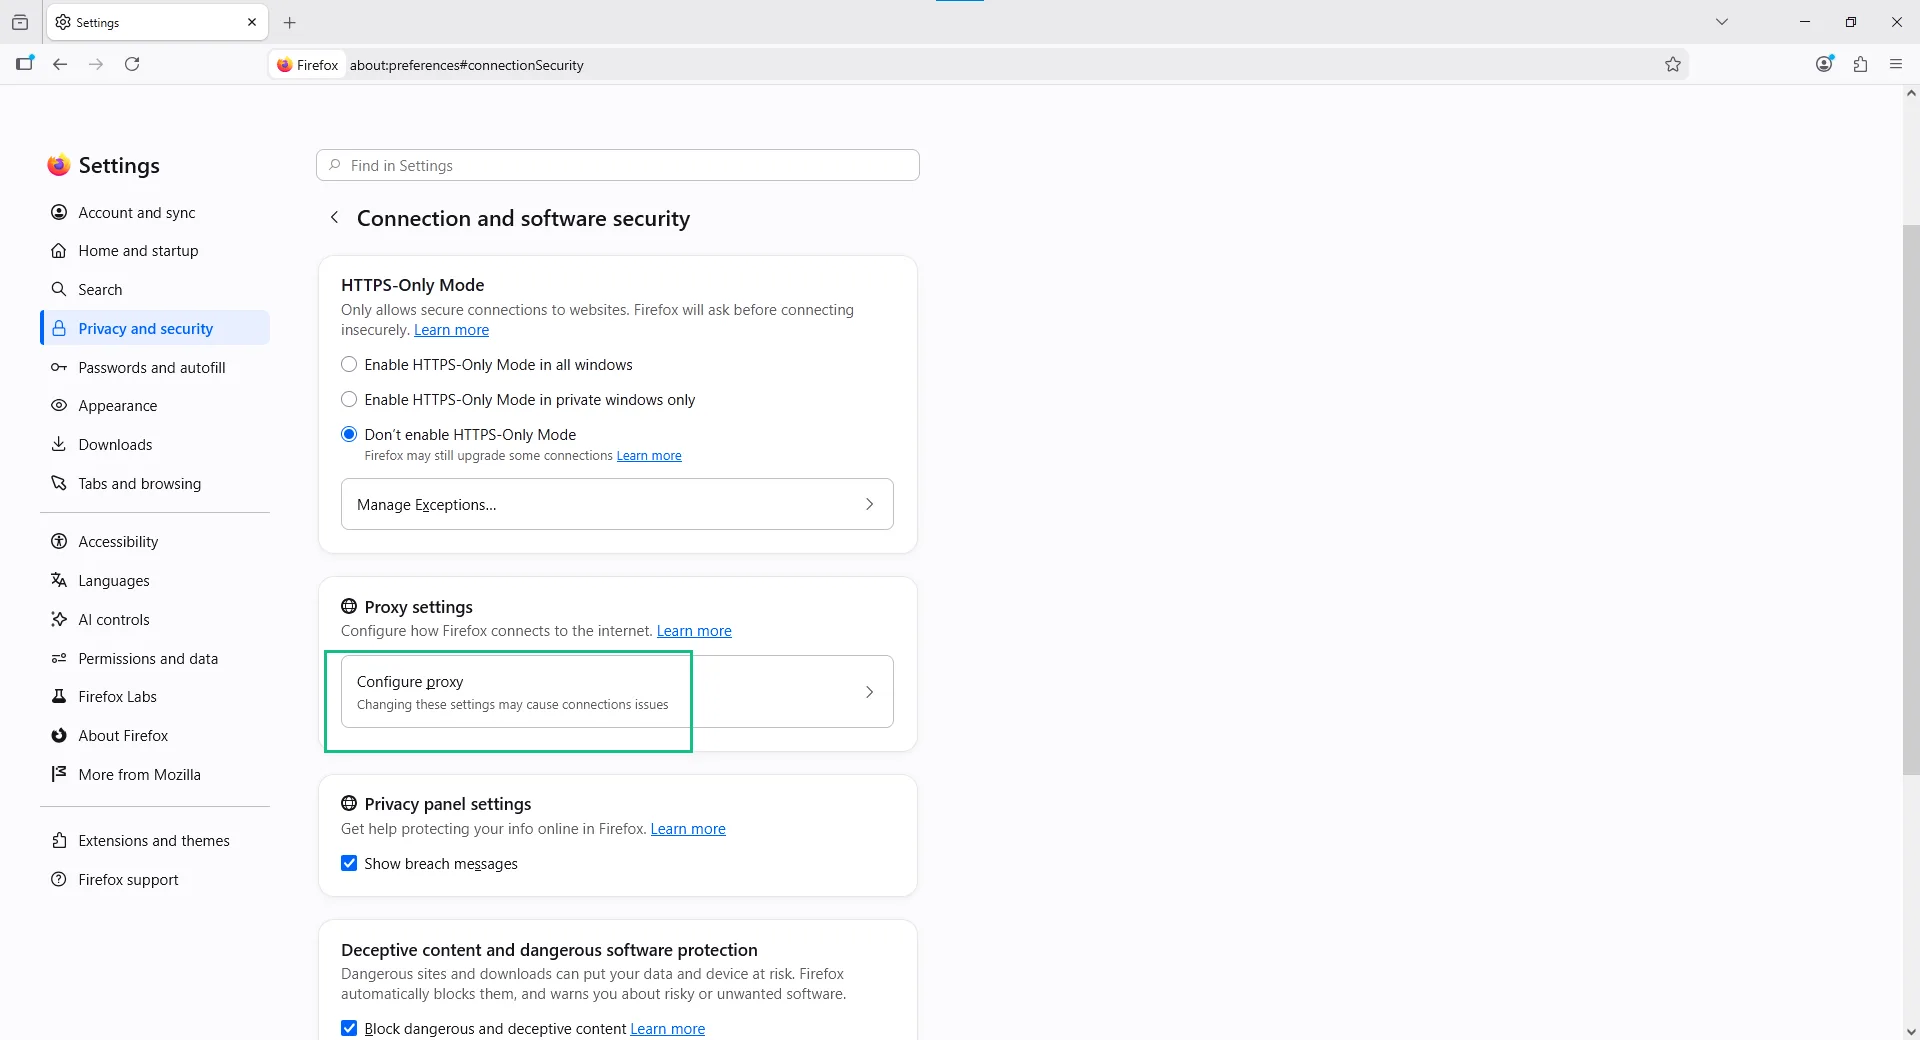
From here, you can either configure a proxy inside Firefox or go the system-wide route.
- For the former, select Manual proxy configuration. I pasted in the Floppydata hostname and port in the HTTP proxy section, and I instructed Firefox to also use this info for HTTPS proxies. Or, you can choose Automatic proxy configuration URL and paste the required URL. Floppydata provides this info if you select As list from Proxy strings. Click OK.
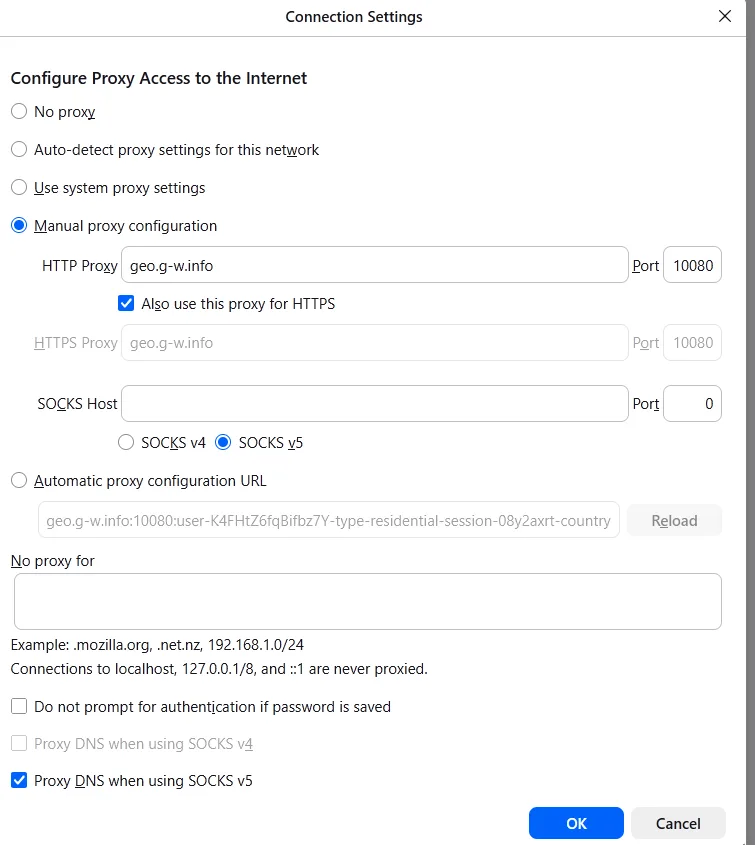
- Alternatively, choose Use system proxy settings to proceed to the next step.
Configuring system-wide proxy settings
You should now be looking at a proxy settings system window. In Windows, it looks like this.
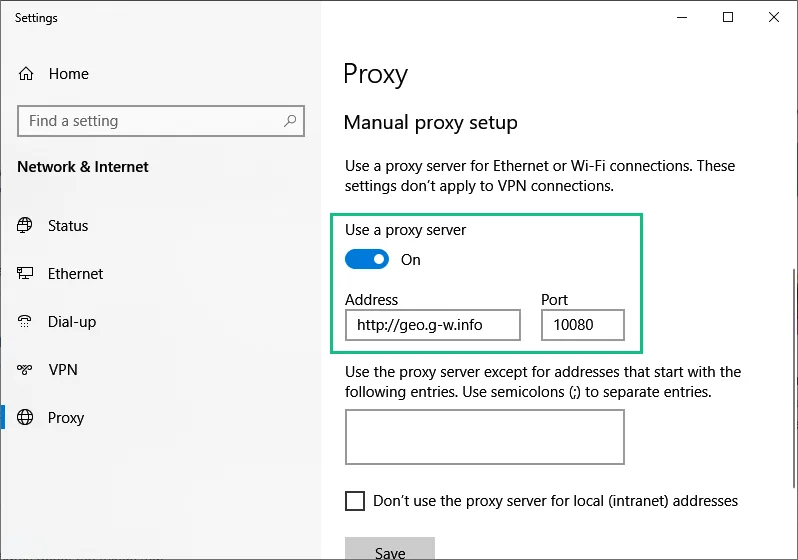
- Under Manual proxy setup, switch use a proxy server to on.
- The hostname goes into the Address section. Port is self-explanatory. Here I’m using a proxy server from Floppydata again, so your information might differ.
- Optionally, you can paste in exceptions and have the proxy ignore local addresses.
- Click Save.
MacOS
Mac system settings are a bit more involved.
- Select your network
- Under Proxies, enable the type of proxy you want to configure.
- Enter the hostname in the Server field. Port goes into Port.
- Toggle Proxy server requires password on and enter your credentials.
- Click OK.
Testing and disabling proxies
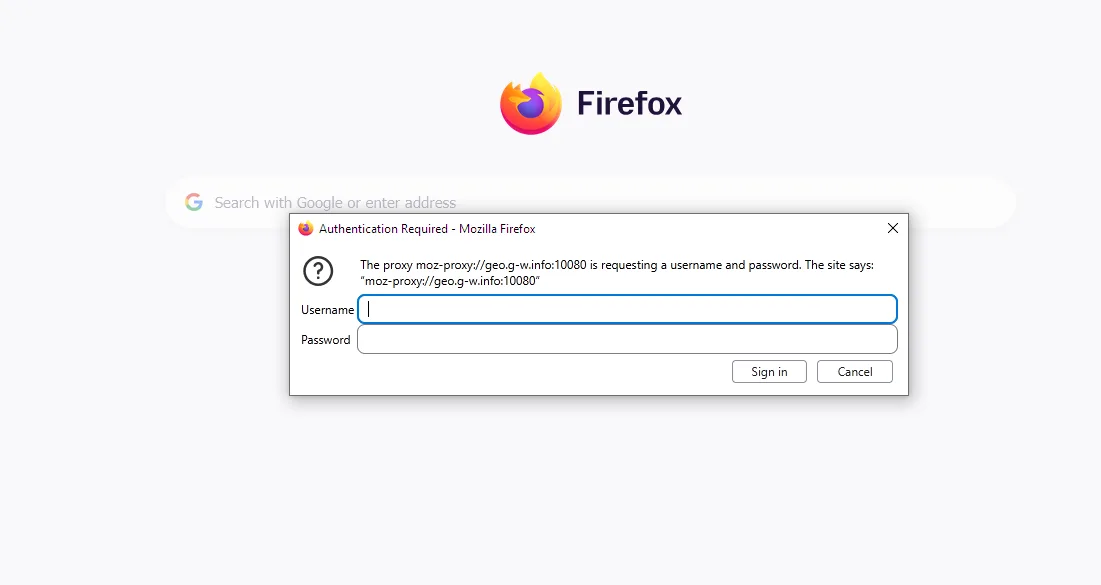
If you did everything correctly, your browser should prompt you to enter a username and a password if you reload a page or try to open a new one.
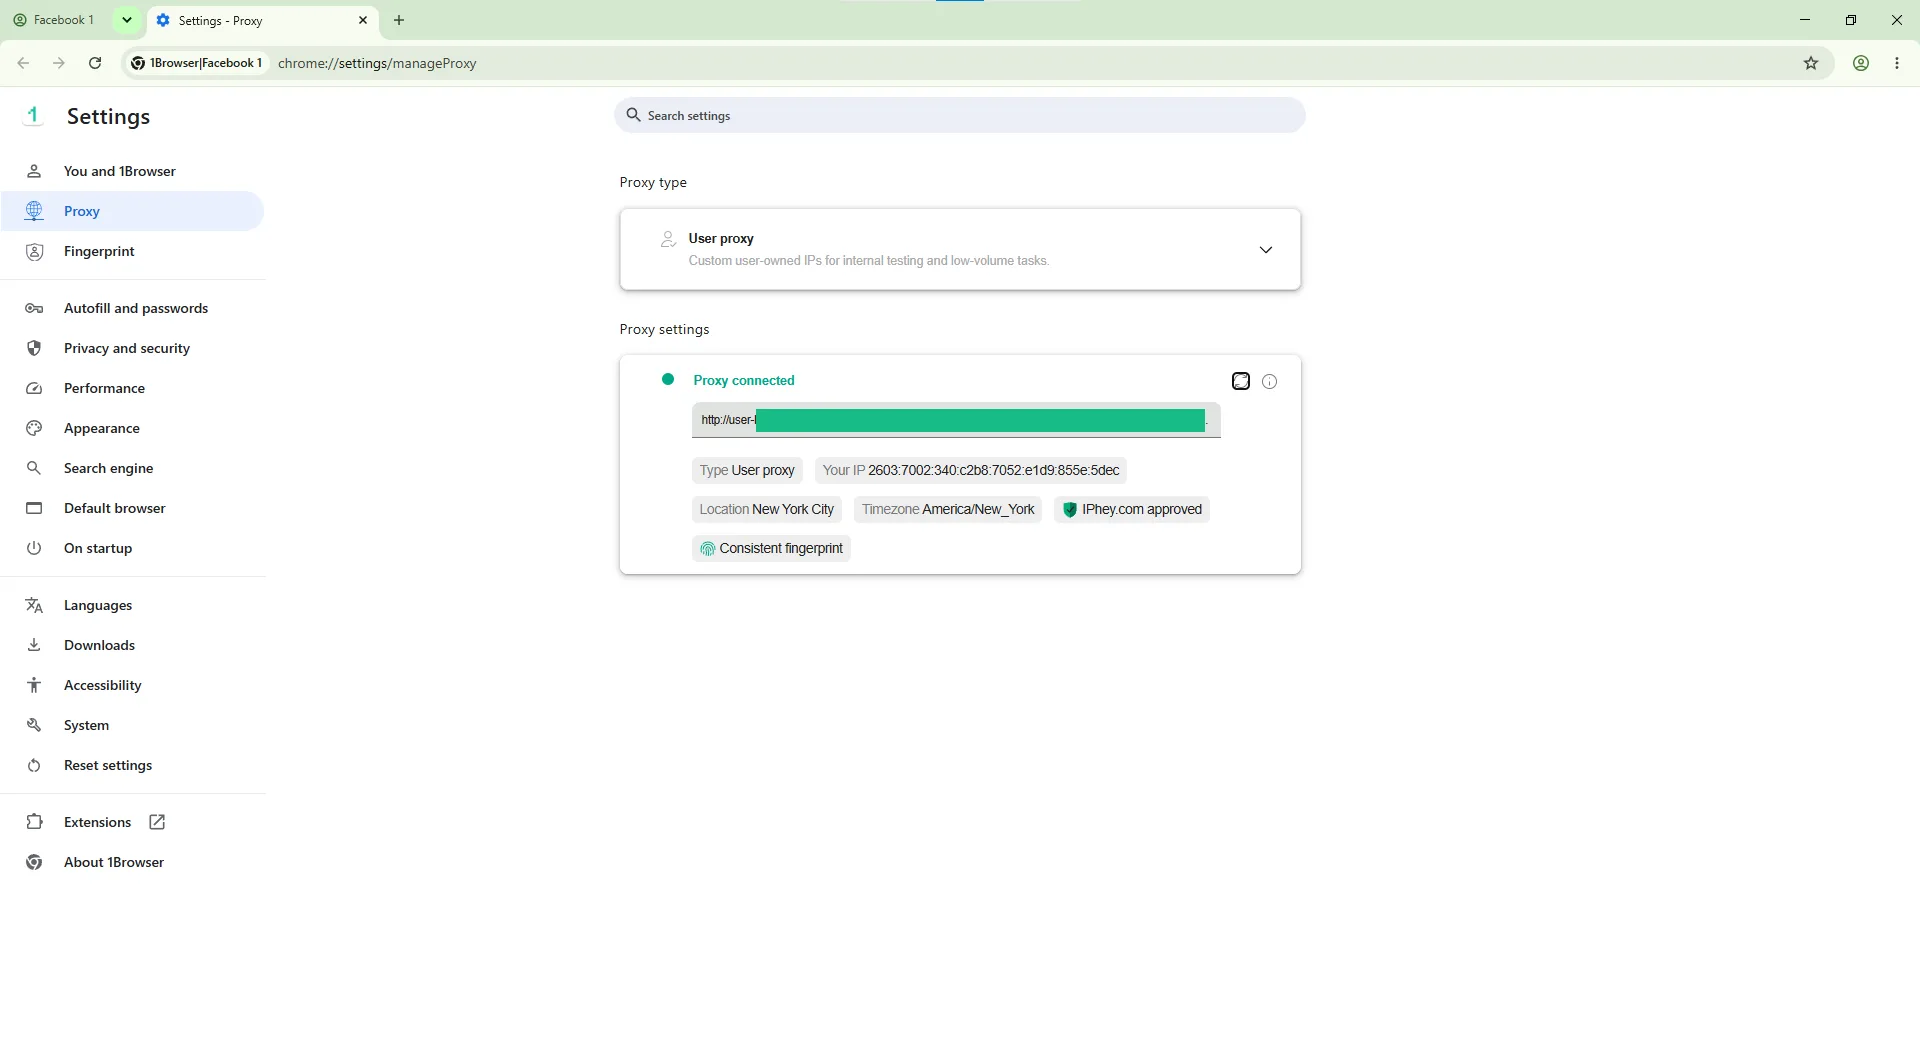
Enter the provider’s credentials. You should be able to browse normally if you did this right. Visit an IP check website to verify the location change. As you can see, my traffic now reads as though it’s coming from New York.
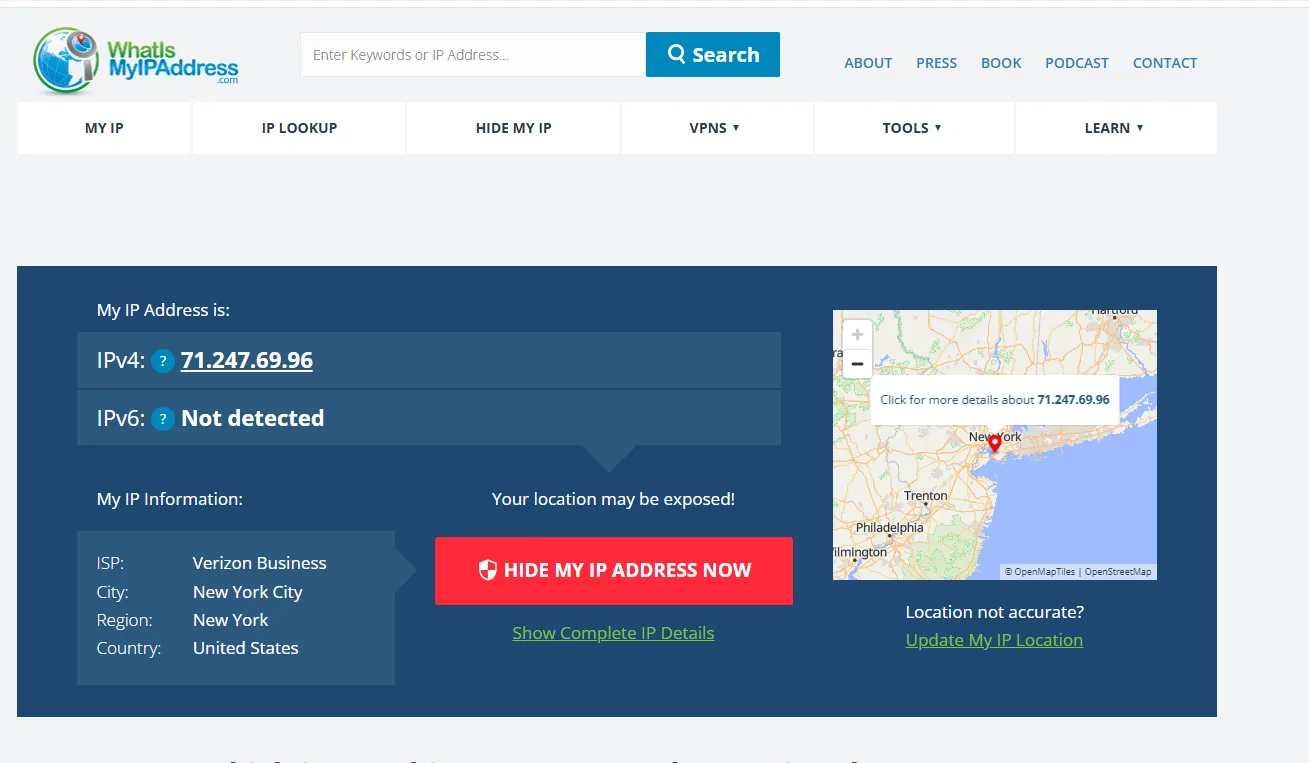
To turn the proxy off, just disable it in system settings. In Firefox, switch back to No proxy in the Configure proxy window.
How to Use Proxy in 1Browser?
There are two issues when it comes to standard browsers and proxies.
The first is tedium. I had to turn on the proxy from the system settings each time I needed it and then turn it back off again with almost every browser. Plus, there’s no way to save more than one configuration. This makes scenarios like regional price checks or ad testing needlessly frustrating.
Incomplete protection is the second, more serious concern. A proxy is good for checking what your website looks like from Egypt, but it alone is not ideal for more sensitive work like data scraping. 1Browser makes this possible with its isolated environments, which also include proxies.
I already provided a walkthrough on downloading 1Browser and setting up profiles for it elsewhere. The proxy part is just as quick and straightforward. Most importantly, you can set up different proxies for each profile to tailor it to specific needs or make it more distinct without having to fiddle with system settings.
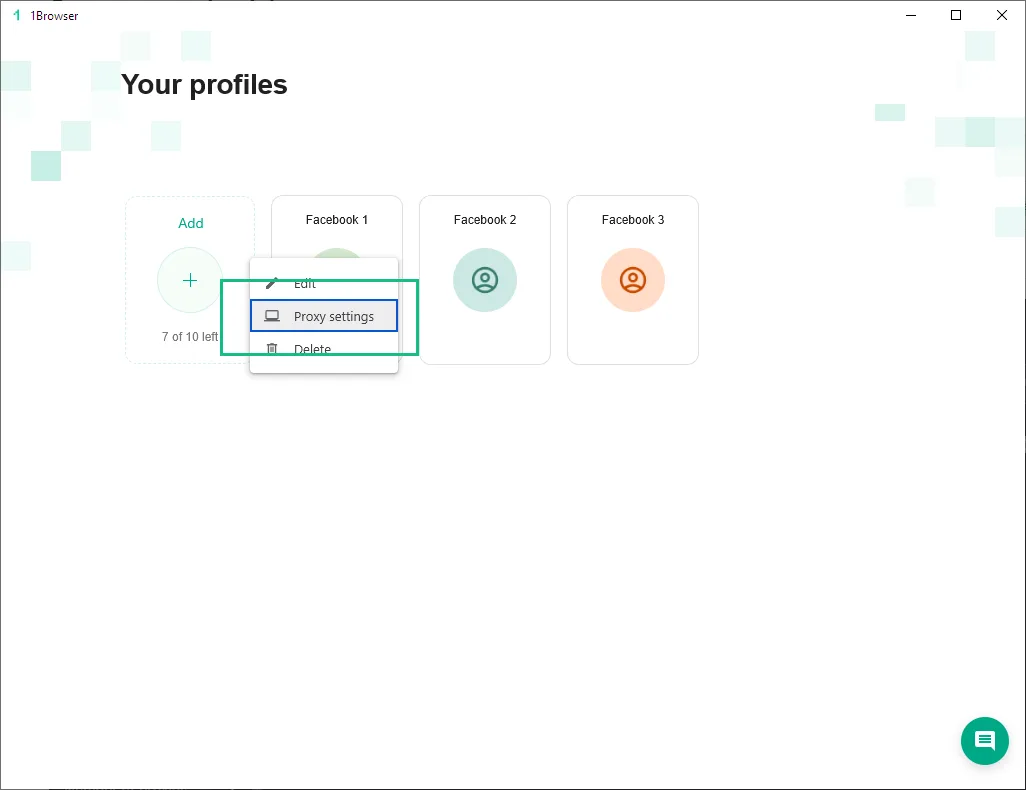
- Click on the dots beside the profile whose proxy you want to set up and choose Proxy settings
- Free proxies from five different countries for testing purposes are the default.
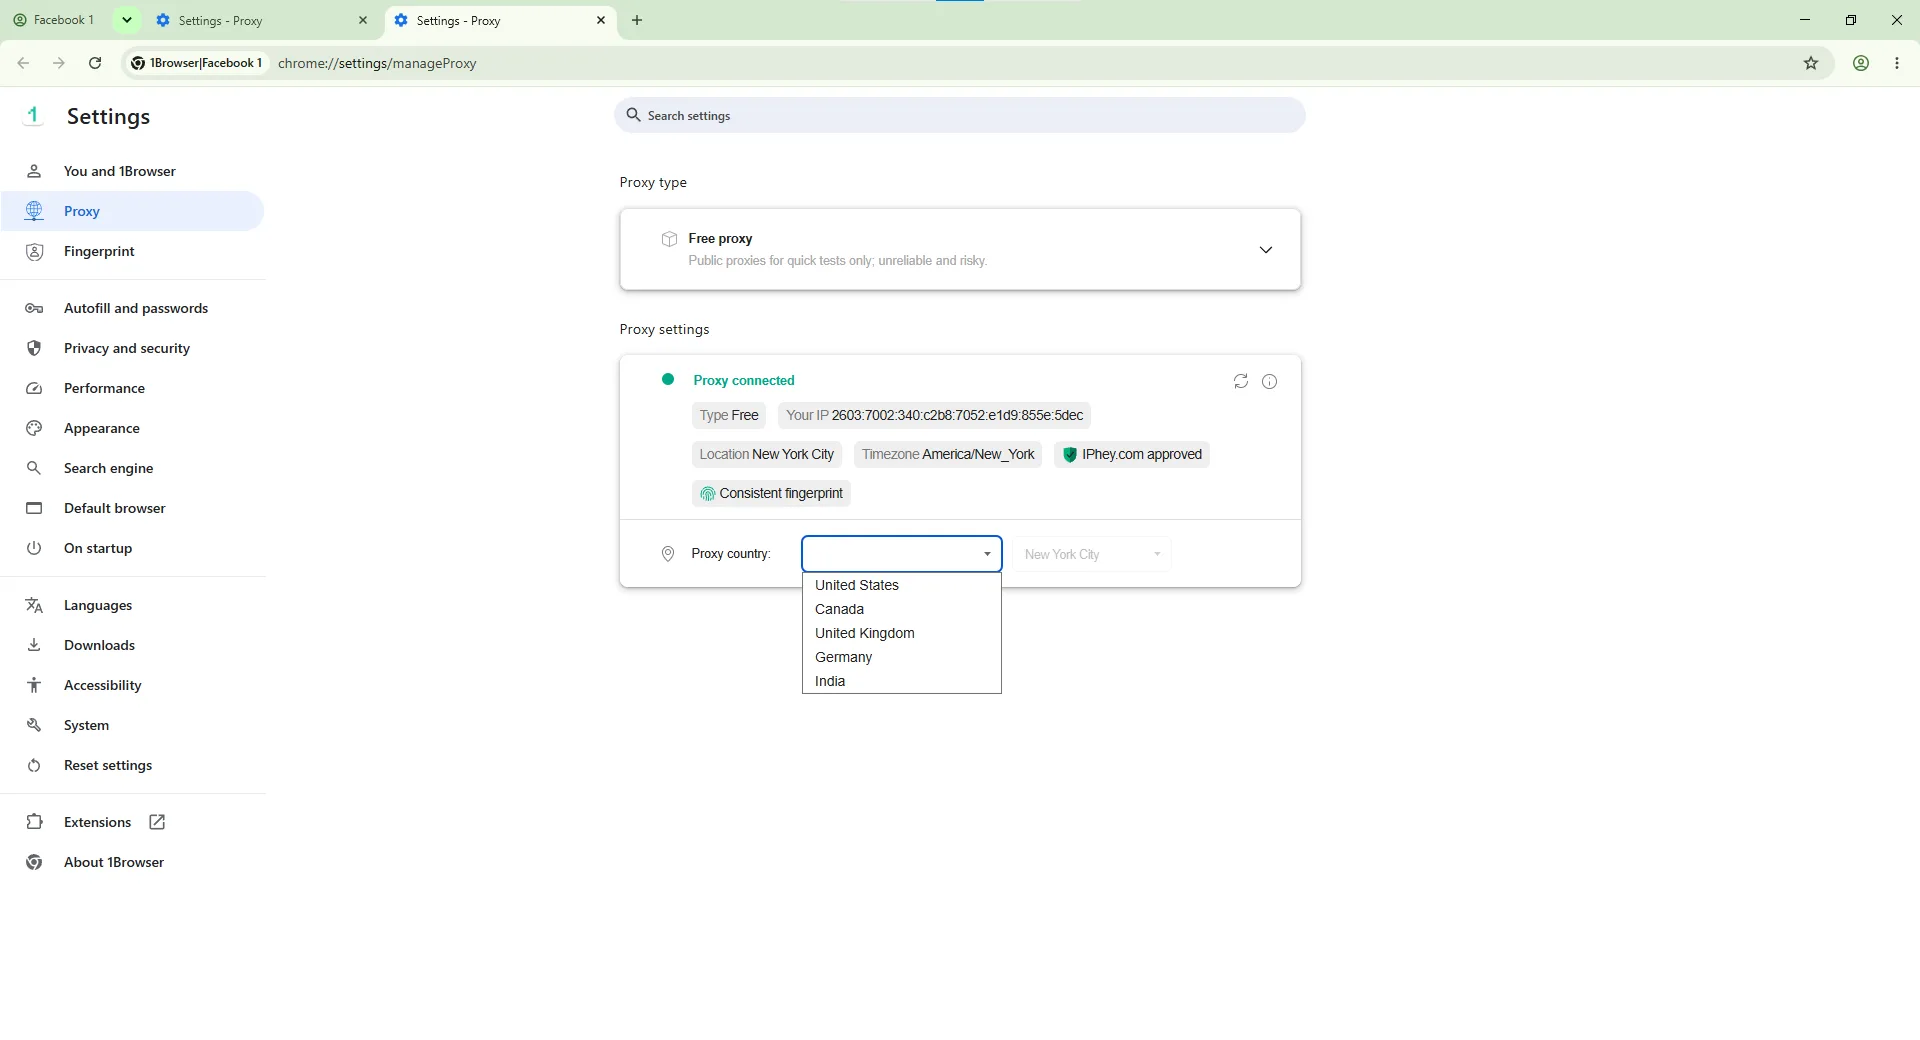
- You can buy proxy traffic directly from 1Browser. This makes things even simpler since you don’t have to keep track of hostnames, credentials, etc.
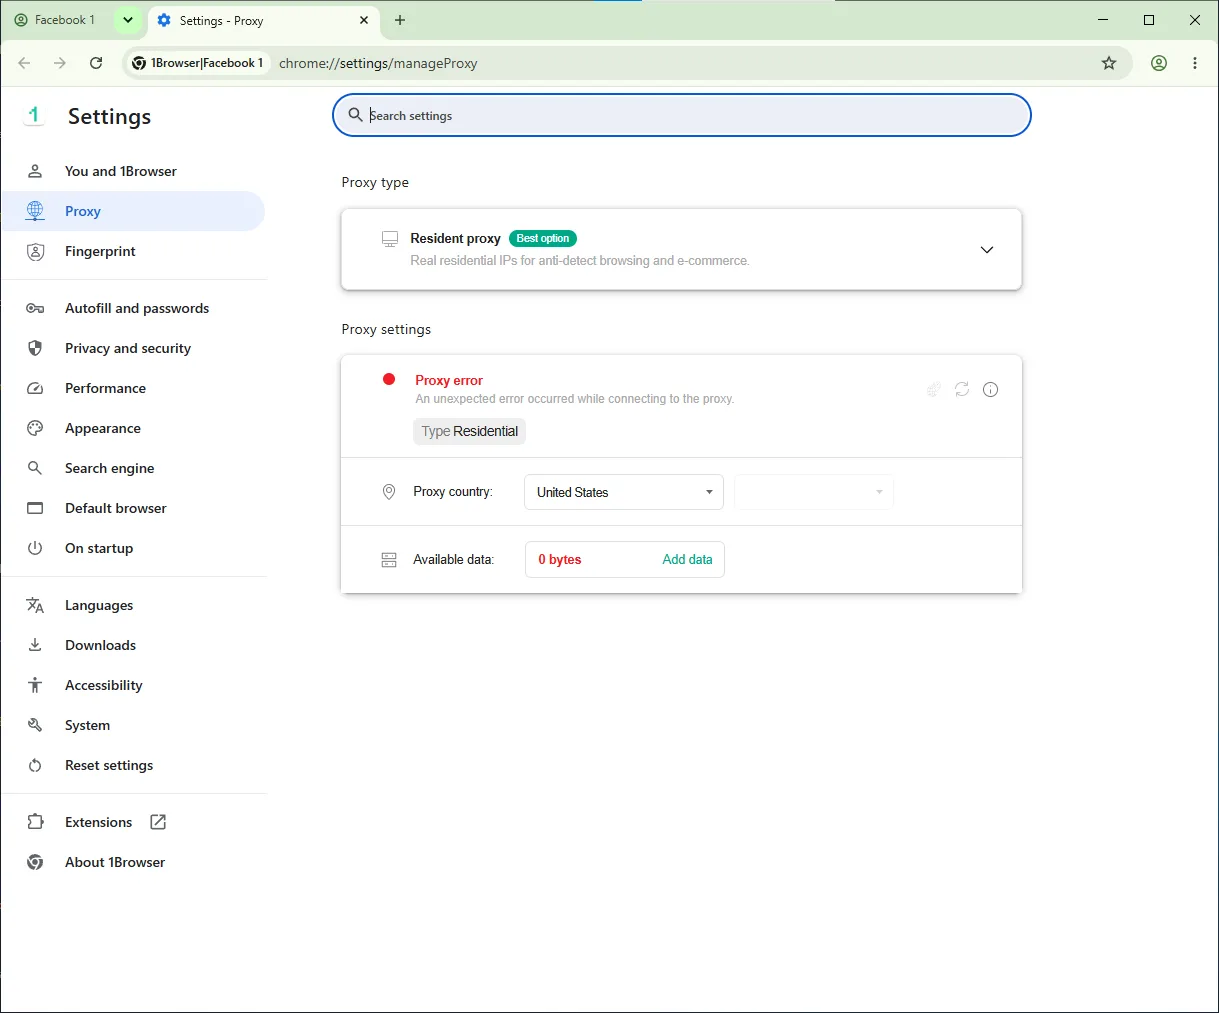
- Alternatively, you can paste in the information from another provider, as I did for Floppydata.
Conclusion
If there’s anything years of working with clients have taught me, it’s that flexibility makes everything easier. Proxies provide that flexibility when interacting with the web, from changing how you experience it to allowing more streamlined access to freely available data that would otherwise be a pain to collect. Now that you know how simple the setup is, and how to take things to the next tier with 1Browser, proxies can finally start working for you, too.