
How to Install VPN on Your Router?

Do you want to protect your online privacy and security on all devices, including smartphones, tablets, and iOS? Modern adversaries use sophisticated and fast cyber threats to compromise your digital security. Therefore, the use of a Virtual Private Network (VPN) has become indispensable.
Unfortunately, many devices don’t support the VPN service. In addition, it imposes strict connection limits. To address these issues, you can install a VPN at the router level to pass the internet traffic of every connected device, such as Roku sticks, gaming consoles, and Smart TVs, through a VPN tunnel. It will protect all your devices without requiring you to buy and install a VPN separately on each one.
Installing a VPN on a router is complicated. The problem arises when we need to install a VPN via custom firmware, such as DD-WRT or Tomato. This article will take a deep dive to help you understand how to install a VPN on a router.
Check Compatibility
First and foremost, you need to check whether your router is compatible with a VPN. You can check compatibility in your router’s box or read the manual. Visit this link to check if your router supports the DD-WRT firmware.
More importantly, I’ll not recommend using DD-WRT on VPN-supported routers. Flashing with third-party firmware can void the warranty of your router or even damage it altogether. The following table demonstrates some router brands, their firmware options, and VPN support.
| Router | VPN Support | Firmware |
| Linksys | Open VPN for some models | Tomato and DD-WRT |
| Netgear | Open VPN for some models | DD-WRT |
| TP-Link | Open VPN for some models | Tomato and DD-WRT |
| Asus | Open VPN and WireGuard | AsusWRT-Merlin |
If you have lost a manual, you can use Google search or check your router manufacturer’s website to find the installation guide. Below is a list of routers, but not limited to, that support a VPN. These routers connect to VPN via Point-to-Point Protocols (PPTP) or OpenVPN.
- Privacy Hero 2
- Asus ROG Rapture GT-AX11000
- Asus RT-AX1800S
- TP-Link kAX6600 Wi-Fi 6
- Express VPN Aircove
Another problem arises when your router and the VPN don’t have the same protocols. In the case of different protocols, even the compatible router will not work.
Install a VPN on Your Router
As soon as the compatibility issue resolves, you can install a VPN on your router. However, the installation procedure may vary depending on the type of VPN and the router’s model. Therefore, I will list typical steps to install a VPN on your router.
Obtain Configuration Files
Unfortunately, I cannot demonstrate exact details because this process varies from VPN to VPN and router to router. Typically, you need to visit your VPN provider’s website to obtain the VPN configuration files.
Open the Login Page of Your Router
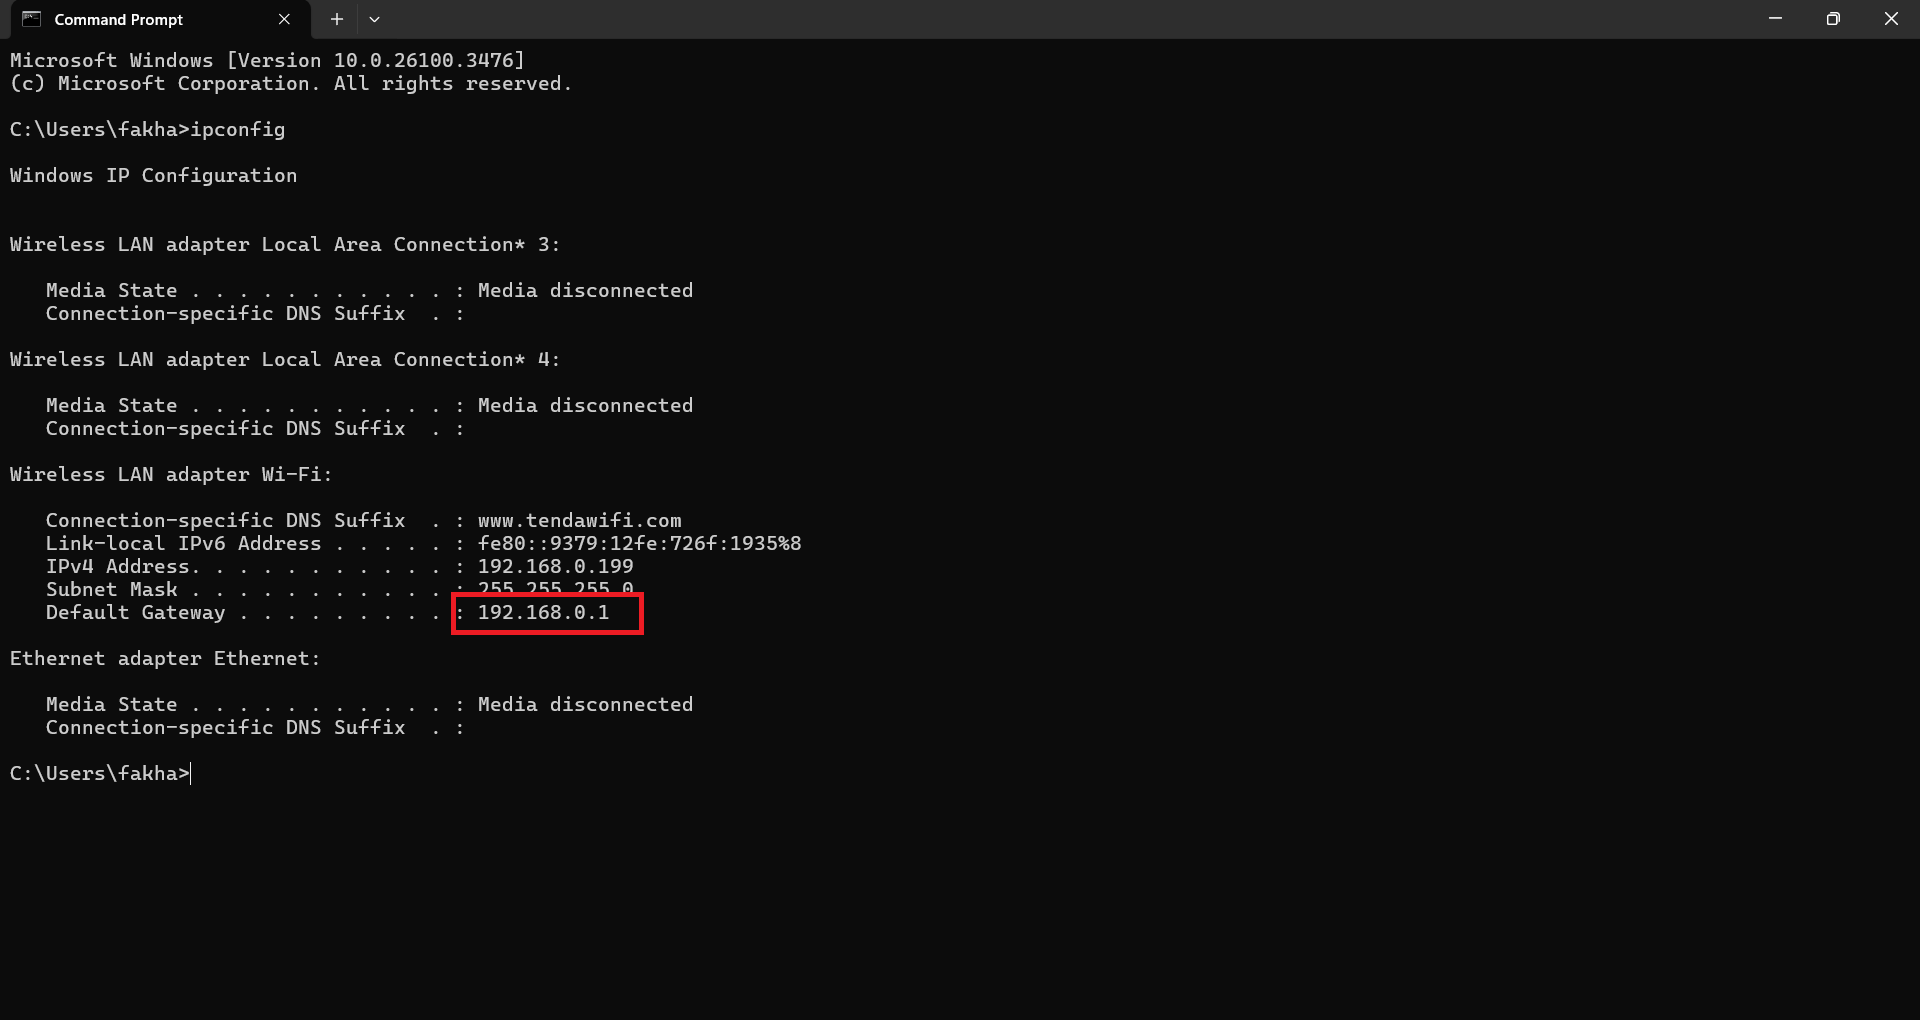
Type the IP address of your router into the browser’s search bar. No sooner does the router’s home page open than type the default password. Typically, the IP address and default password are located on a sticker on the back side of your router. However, if you don’t find this way, open the “Command Prompt” and type “ipconfig” and press Enter. Your router’s IP address is shown on the “Default Gateway” line. Look at the following Figure 1 for more details.
Activate the VPN and Follow the Guidelines
As mentioned before, the process may vary depending on your router’s model, but in most cases, you need to visit a website or an app. Most VPN providers offer a setup tutorial for their VPN. The guide may include how to upload configuration files, add login details, and so forth. For example, if your VPN provider is ExpressVPN, configuration files can be found through “ExpressVPN router setup.” Having these files enables you to set up the VPN client.
Test the VPN
Once you configure your VPN client or VPN server on your router, it will start working and protecting all your devices. Before surfing the web, you need to check if your VPN is working properly. VPN failures occur due to VPN leaks, which cause your real IP address to be visible. Three types of VPN leaks include DNS leaks, WebRTC leaks, and browser extension leaks. Norton cybersecurity firm guides users on how to test VPN leaks to verify whether your VPN is working accurately.
Set NordVPN on an Asus Router
In previous sections, I generally discussed how to install a VPN on a router. On the contrary, I’ll present an example of NordVPN and an Asus router. Configuration details are given below.
Before starting the configuration, ensure that your router has OpenVPN 2.4.x version, as it provides a smooth experience.
Log in to the Asus Router
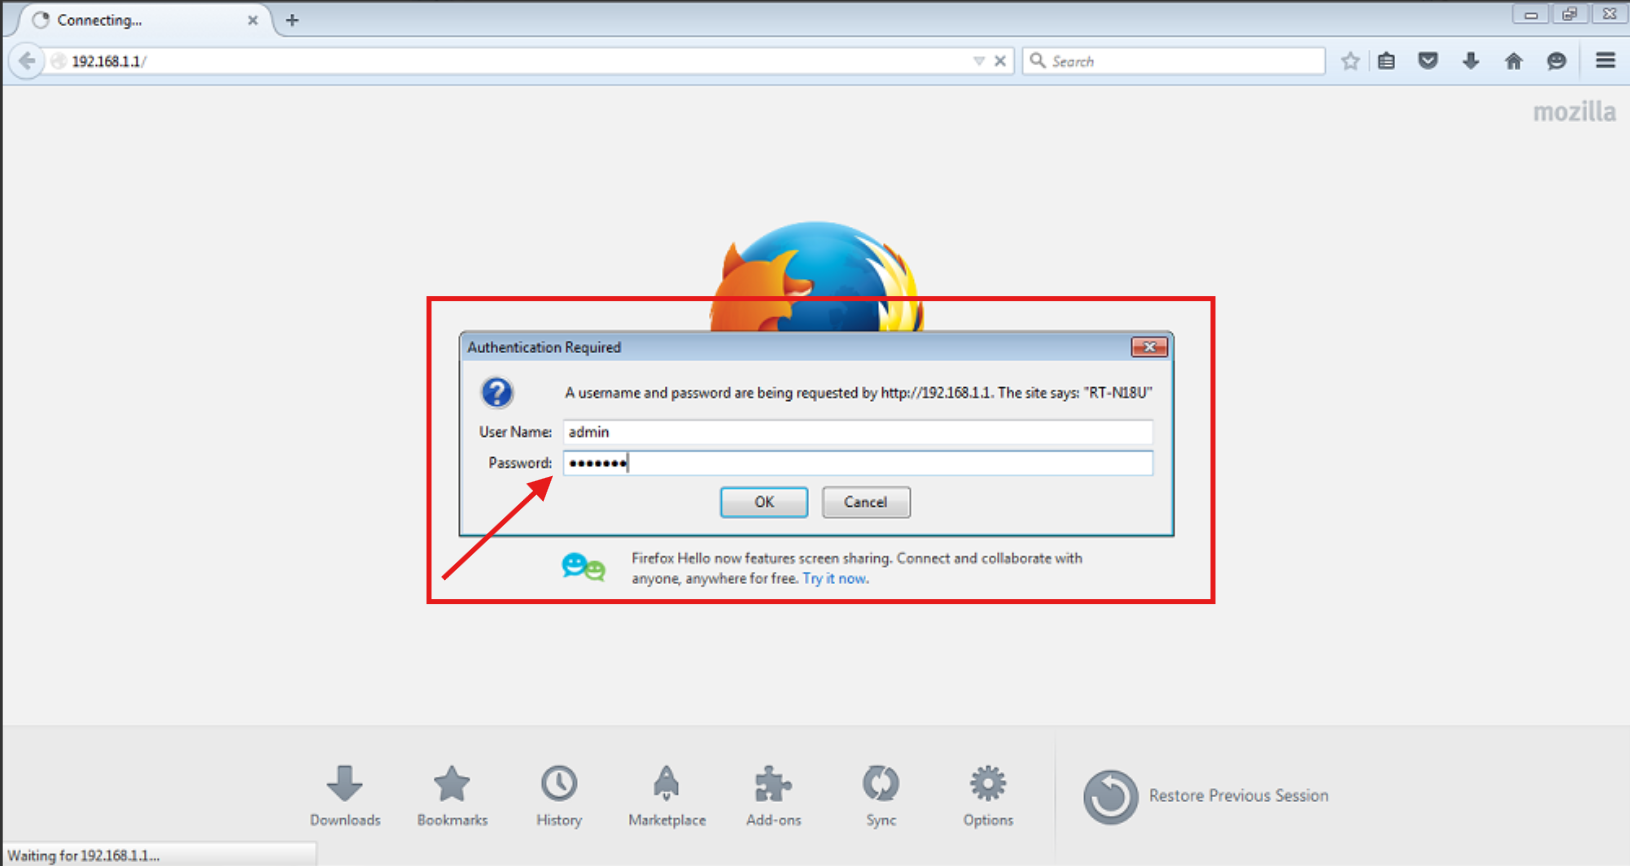
Asus routers typically have a 192.168.1.1 IP address. Connect your router to your laptop and type the IP address in the address bar of your web browser. Alternate options include asusrouter.com or router.asus.com. As soon as you hit Enter on your keyboard, a pop-up will appear asking for your login credentials. The default username and password are “admin” in both cases.
Select VPN
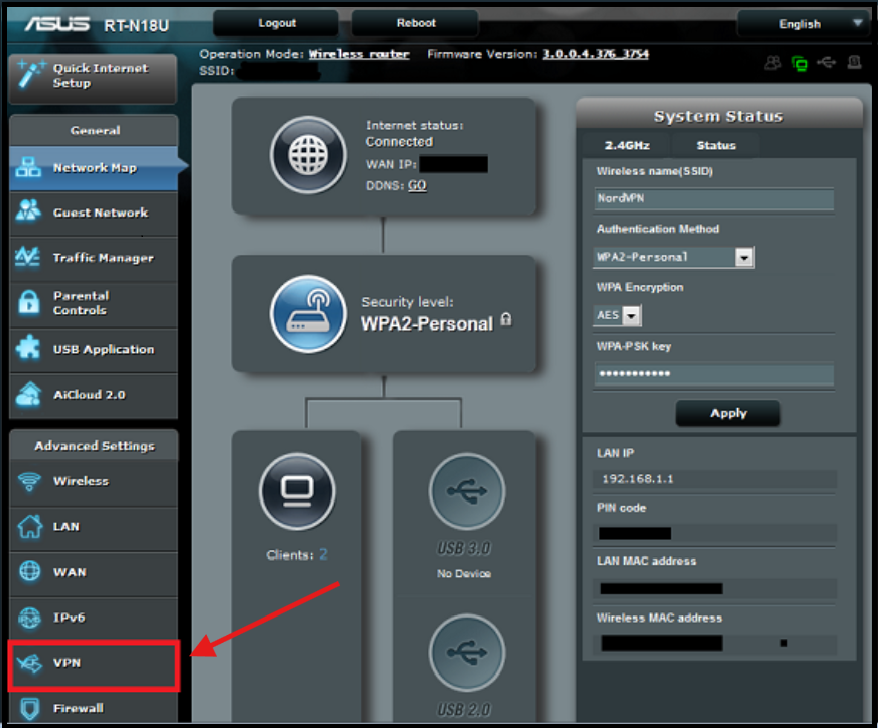
After logging in, the Asus home page will appear, where you click on the “VPN” option located in the bottom left of the page. See Figure 3 below.
Select VPN Client
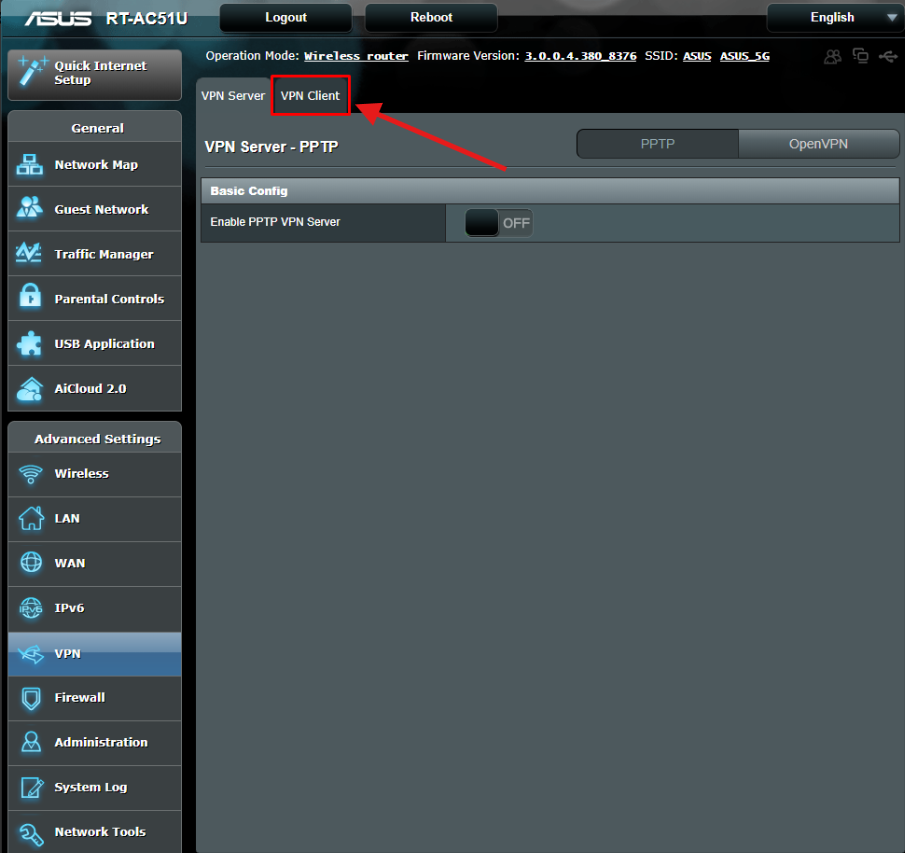
The Asus VPN menu shows two tabs on the top – “VPN Server” and “VPN Client.” Hit the “VPN Client” tab.
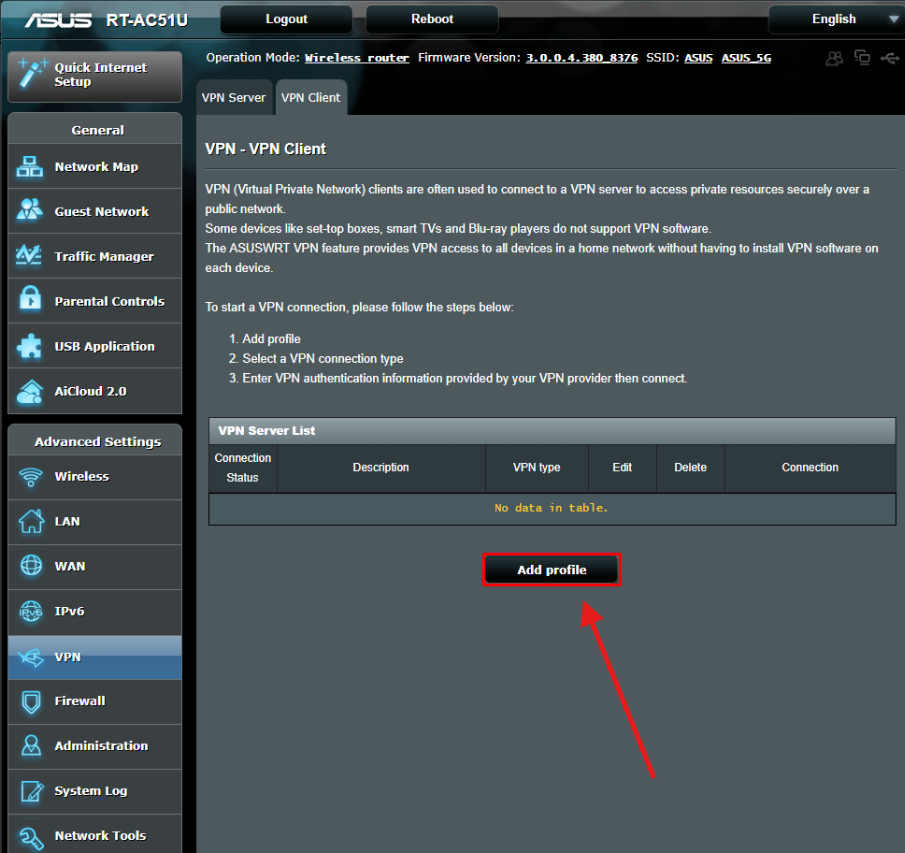
Go to Add Profile
The “Add profile” tab allows you to upload the configuration files.
Select OpenVPN
A new window will pop up containing three fields to be filled, including Description, Username, and Password.
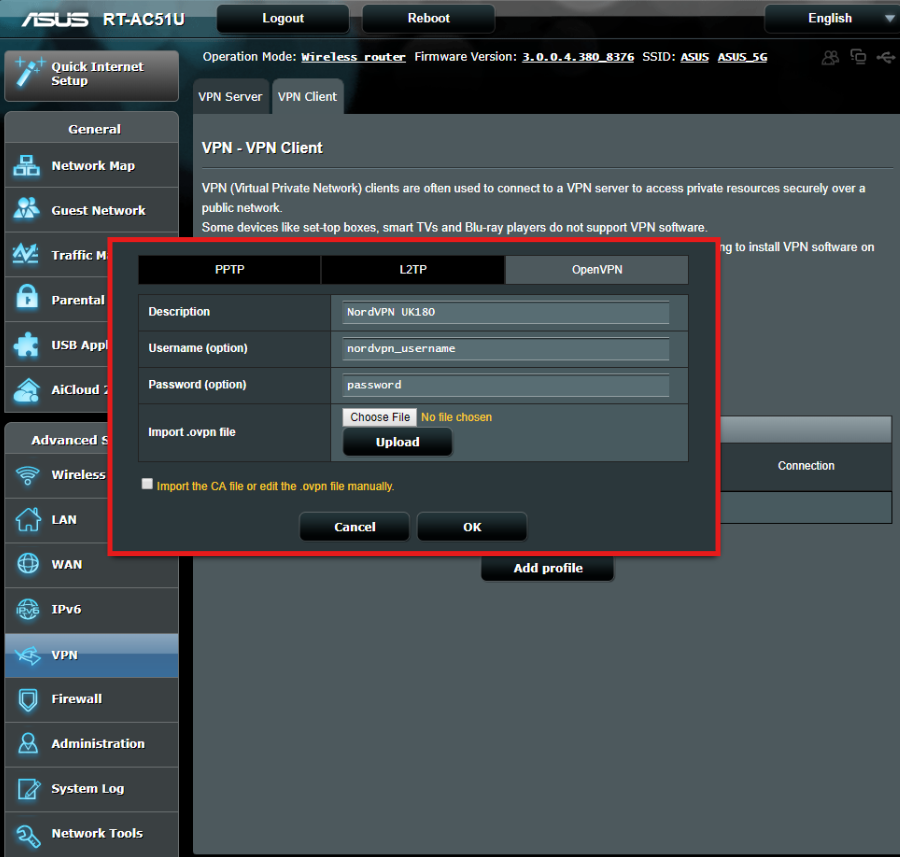
If you have an account for NordVPN, you can download the configuration files for your Asus router.
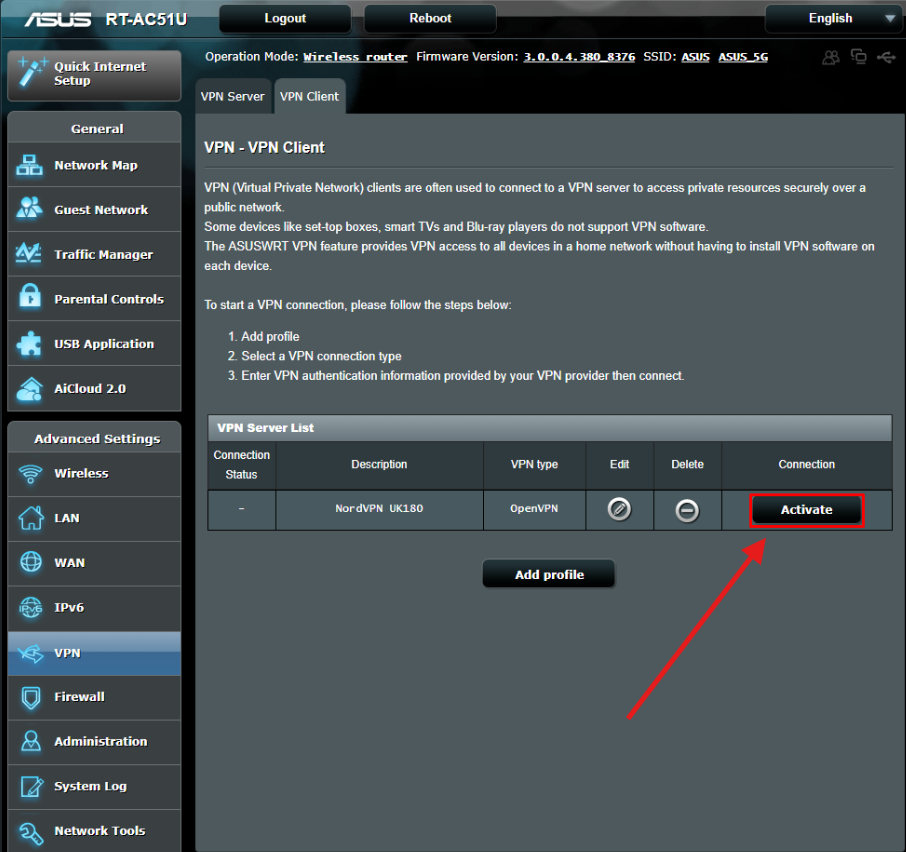
Activate VPN
Once you upload the files and press the “OK” button, Asus adds it to the “VPN Server List.” Toggle the “Activate” button to start the VPN on a router.
The Bottom Line
Installing a VPN on a router is a daunting task. However, VPN protection is essential to ensure your privacy on all connected devices, including laptops, desktops, tablets, and smartphones.
The router model and VPN must be compatible with each other to work properly. The typical steps to install a VPN on a router are obtaining configuration files, opening the login page, activating the VPN and following the guidelines, and testing the VPN. In addition, this article also provides a guide to install NordVPN on an Asus router.