Omegle Ban Fix – How to Unblock Omegle with a Proxy IP

Usually, when platforms ban someone, they ban their account, but when Omegle bans someone, it’s their IP address that they target. Why? Because there is no such thing as “an Omegle account” to ban in the first place, since it’s an anonymous platform.
So if you’re banned on Omegle, I have some good news for you: Unblocking Omegle is fairly easy; you just have to change your IP address.
In this guide, I will teach you how to do so using proxies. They are my favorite method to get a fresh, new IP address that isn’t banned by Omegle, and freely access the platform.
Let’s get started.
Quick note: the original Omegle.com actually shut down permanently in late 2023, so only clones or alternatives exist currently, and the proxy methods below work perfectly for all of them!
Why does Omegle ban you?
Chat sites today use advanced AI to monitor conversations in real-time, so they have become very strict with their users.
Here are some reasons why you might get banned on Omegle:
- If you get skipped by too many people in a short period of time, the system assumes you’re a troll, a bot, or simply “unpleasant.”
- If you violate their “Terms of Service” with inappropriate content, harassment, and bot-like behavior
- If you share copyrighted material, by having a movie, TV show, or popular music getting played in the background, the AI can flag it as a copyright violation.
- If you’re using a datacenter IP or a VPN connection: if you activate a VPN, you’ll be using the same IP address as every user who’s activated the same VPN, so if one of those users gets banned, you will get banned as well. Same for data centers because Omegle can detect that you’re using a server rather than a home connection and will block you before you see a single face.
How to bypass Omegle ban using a proxy
There are two methods I’d like to share with you to unblock Omegle with a proxy. Method one is buying a proxy from a provider, then using it on your browser, which can be a bit long. Method two is to download 1Browser, which is a proxy browser where you can activate one of its integrated proxies in a single click then open Omegle on that same browser with a new IP.
Let’s get into the details of each method:
Method 1: Buy a proxy then add it to your browser
This method, as you can see from its title, is split into two steps: the first is grabbing the proxy from a proxy provider, the second is setting up (or “activating”) that proxy on your device or browser.
The first step is critical because for this method to work the right way, you need to find a good proxy provider that meets certain criteria, like:
- Offering different proxy types, like residential and mobile proxies
- Wide choices regarding locations, including city-level targeting
- Clean history and low fraud scores
- Their proxies must have fast response times, ideally under 500ms
- They must have a success rate of 95-99% (which guarantees that your connection won’t drop every minute)
- Most importantly, the provider must be affordable for an average user who just wants to chat on Omegle (no enterprise-level prices).
I looked up many providers that check all these boxes, and the best one I found is Floppydata.
Here’s how you can buy your proxy from there:
- Open an account on Floppydata, and once you’re on the dashboard, click on “Create proxy pool” on the left side panel
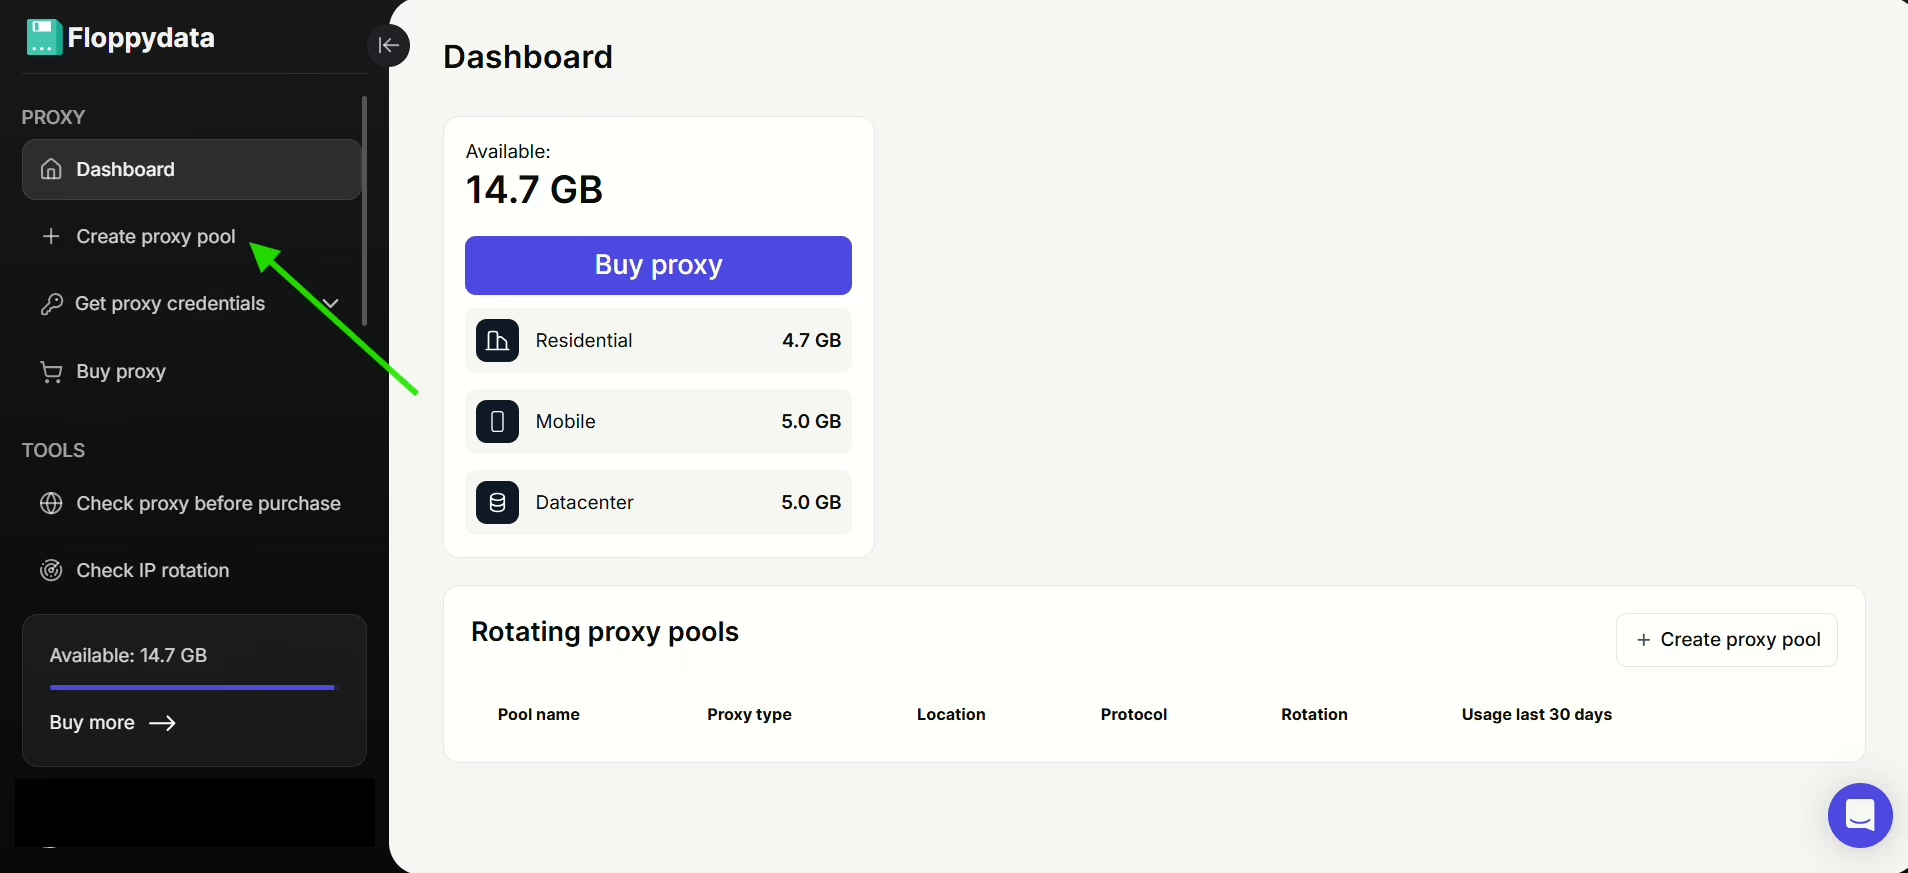
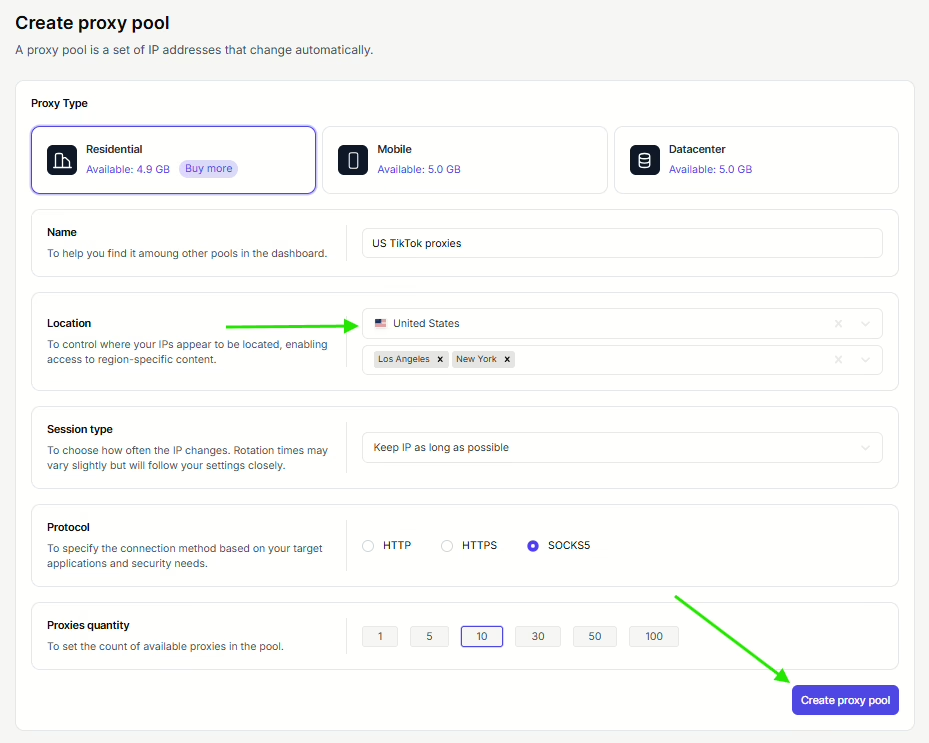
- Fill in all the necessary details. You can either keep your country as your location or change it if you want. Once you’re done, click on the “Create proxy pool button”.
- Your proxy list should look something like the image below:
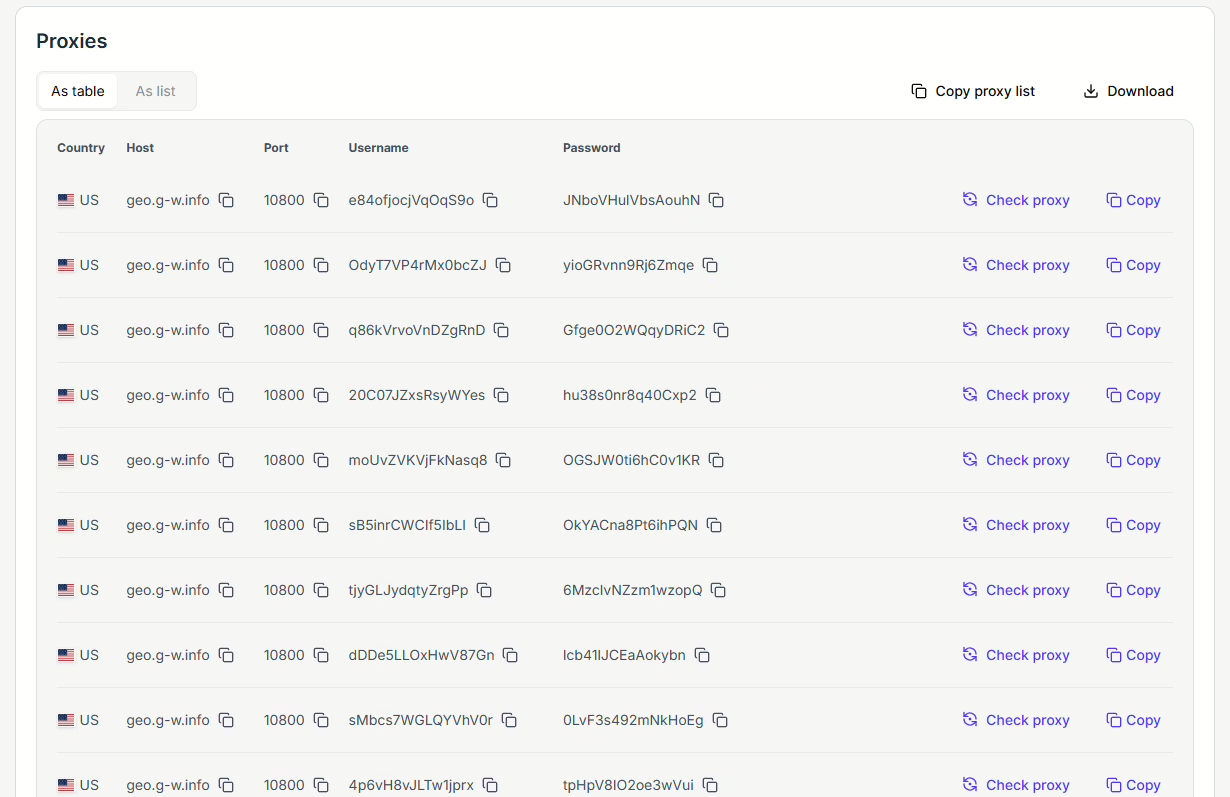
This list allows you to easily copy all the info regarding your proxy (like its Host, Port, Username, and Password) just by clicking the “copy” icon on the far left.
So, now that you have at least one proxy in your list, you can move to the part where you’ll activate it on your browser or on your device.
The Chrome browser, for example, requires you to set up your proxy in your device settings.
To access the device setting, just open your Chrome browser, click the three dots on the top right corner then click on Settings → System → Open your computer’s proxy settings.
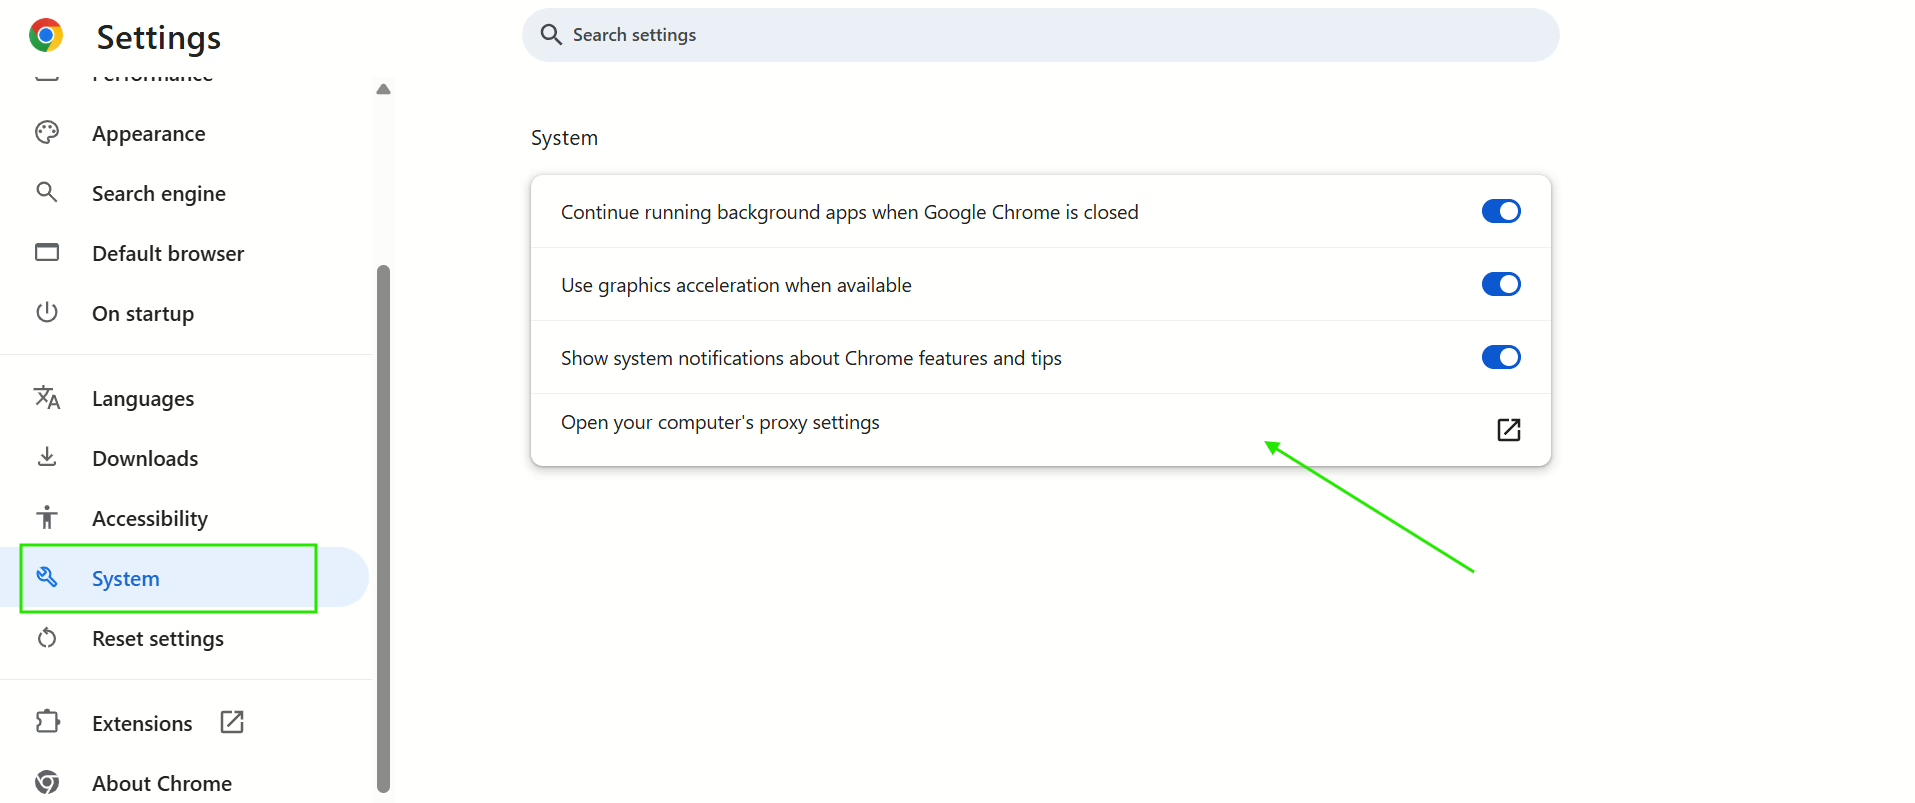
Your device settings will eventually open, and there, you’ll paste your proxy’s port and host addresses, then click on Save.
Once that’s done, you only have to open Chrome again, enter your proxy’s username and password, and you’re in! All ready to unblock Omegle with a new proxy IP address that is not banned.
If you feel this is a bit complicated, there is another browser you can use instead of Chrome to activate your Floppydata proxies: 1Browser.
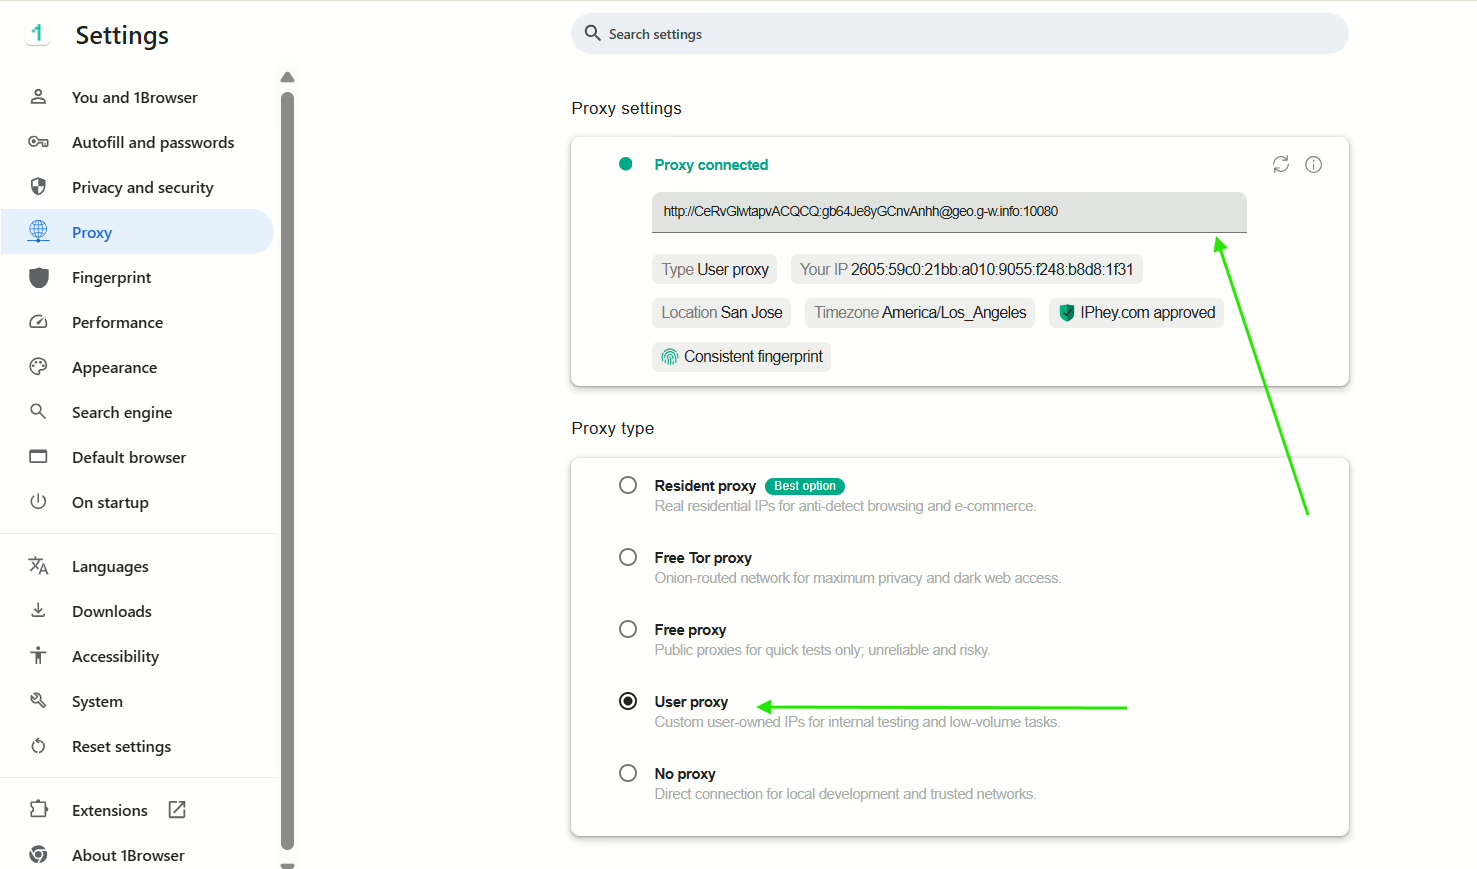
Just install it, create a profile (you can create up to 10 profiles for free by the way!), and go to its settings then click on Proxy:

Choose the User proxy type and paste your proxy address into the input field in Proxy settings.
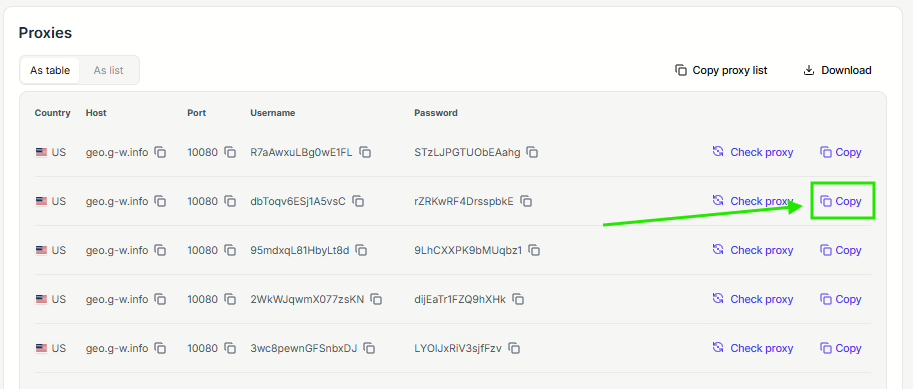
To get your proxy address, just go back to your Floppydata list of proxies, choose a proxy, and click on the copy button; that’s what you’ll paste in the input field from the image above.
That’s how you set up your proxy on 1Browser.
So, to sum this up: you have to first grab your proxy IP address from Floppydata, then set it up in your browser settings or device settings to activate it.
Setting up your proxy on 1Browser was way faster and easier than doing it on Chrome, and it comes with other perks: fingerprint protection, which makes your connection way more anonymous.
Another perk of 1Browser is that it allows you to skip the whole part about getting a proxy from a separate provider. Let’s find out how:
Method 2: Use 1Browser to get a proxy and a secure browser in one place
1Browser is both an anti-detect browser and a proxy browser, which means it not only protects your browsing fingerprint and gives an anonymous identity, but it also allows you to use its built-in proxies to change your IP address.
After installing the browser and opening a profile, click on the three dots on the top right corner → Settings → Proxy
Here are the proxy type options you have on 1Browser:
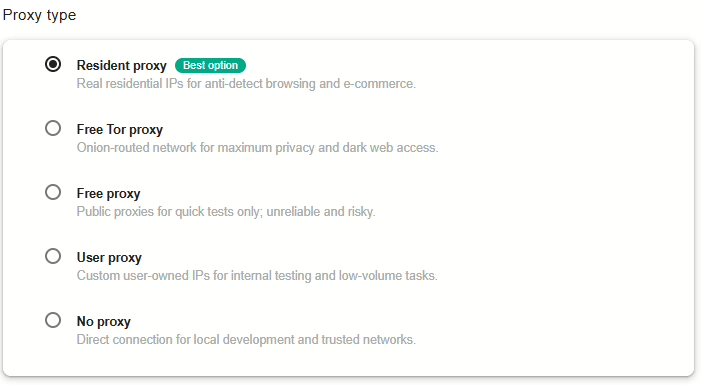
The best option is obviously resident proxies because they are the closest to a real home connection among the available options.
The free proxy type is good only for quick tasks that are not sensitive or important.
The free Tor proxy type is highly secure but very slow.
And as for User proxy type, we talked about it in Method 1 – it’s where you can use the proxies you bought from an external provider.
I personally only use the resident proxy type, because it’s safe and fast, and it’s literally a shortcut: no need to grab a residential proxy from Floppydata anymore, I just have to use 1Browser’s.
Just select the Resident proxy type, choose your preferred proxy country, and wait for the green “Proxy connected” signal to show up.

After doing this, your 1Browser profile now has that proxy IP connected, and you will be able to access Omegle freely!
Final thoughts
Although chat sites like Omegle are a nice place to meet new people and have good conversations with strangers, their banning systems are a bit annoying. Sometimes you get banned for absolutely no reason. It’s good to know that all you have to do to bypass an Omegle ban is to change your IP address using a proxy.
My favorite method is to use 1Browser proxies directly, because you just have to open the browser, activate one of its built-in proxies, and open Omegle successfully on that same browser. No need to go through any external proxy providers and complex set ups at all!
Bonus: 1Browser allows you to create up to 10 profiles and use up to 5 proxy locations for free! Download it today to unblock Omegle with a proxy in two clicks.