How to Access TikTok US With Proxies (2026 guide)

Accessing TikTok US remains a common goal for creators, shoppers, or ordinary people who just want to scroll through the same content as Americans.
While the average casual user would use a VPN, professionals, and people who use TikTok for e-commerce, social media management, and data analysis often choose proxies.
In my opinion, this is a smarter move that I highly recommend for many strategic reasons:
- Using a VPN means you share the same IP with hundreds of other users, and if one user on that IP breaks TikTok’s rules, all users of that IP will be shadowbanned or restricted, including you. With a proxy, you get a unique IP that belongs to you only.
- A residential proxy uses the IP address of a real US household; it makes you look like a real person sitting in a living room in LA, while with a VPN, you look like a bot connecting from a server farm.
- If you manage multiple TikTok accounts, you can assign each account its own proxy IP instead of logging into all of them from the same VPN IP (which is a major red flag for TikTok).
That’s why in this guide, I chose to teach you how to access TikTok US with proxies – I will tell you where to find the right proxies and how to use them properly. Let’s begin!
How to access TikTok US using proxies?
To connect to TikTok US even if you’re physically not in the United States, you need a US proxy. To get one, there are two main methods:
- Either choose a reputable proxy provider, buy a US proxy from there, and set up that proxy in your device or browser settings to activate it.
- Or, save time and avoid the extra work by using a proxy browser like 1browser, where you can find built-in proxies inside it that you can directly use on that same browser, including free and paid US proxies.
I will explain both methods in detail below:
Method 1: Buy proxies and add them to your browser
I will split the explanation of this method into two steps: the first step is about where to buy your US proxies, and the second one is how you can use them on your browser.
Step 1: Buy your US proxy from Floppydata
I could have chosen any other proxy provider, but I find that Floppydata is the best option, given the value for money. To buy your US proxy from there, follow these steps:
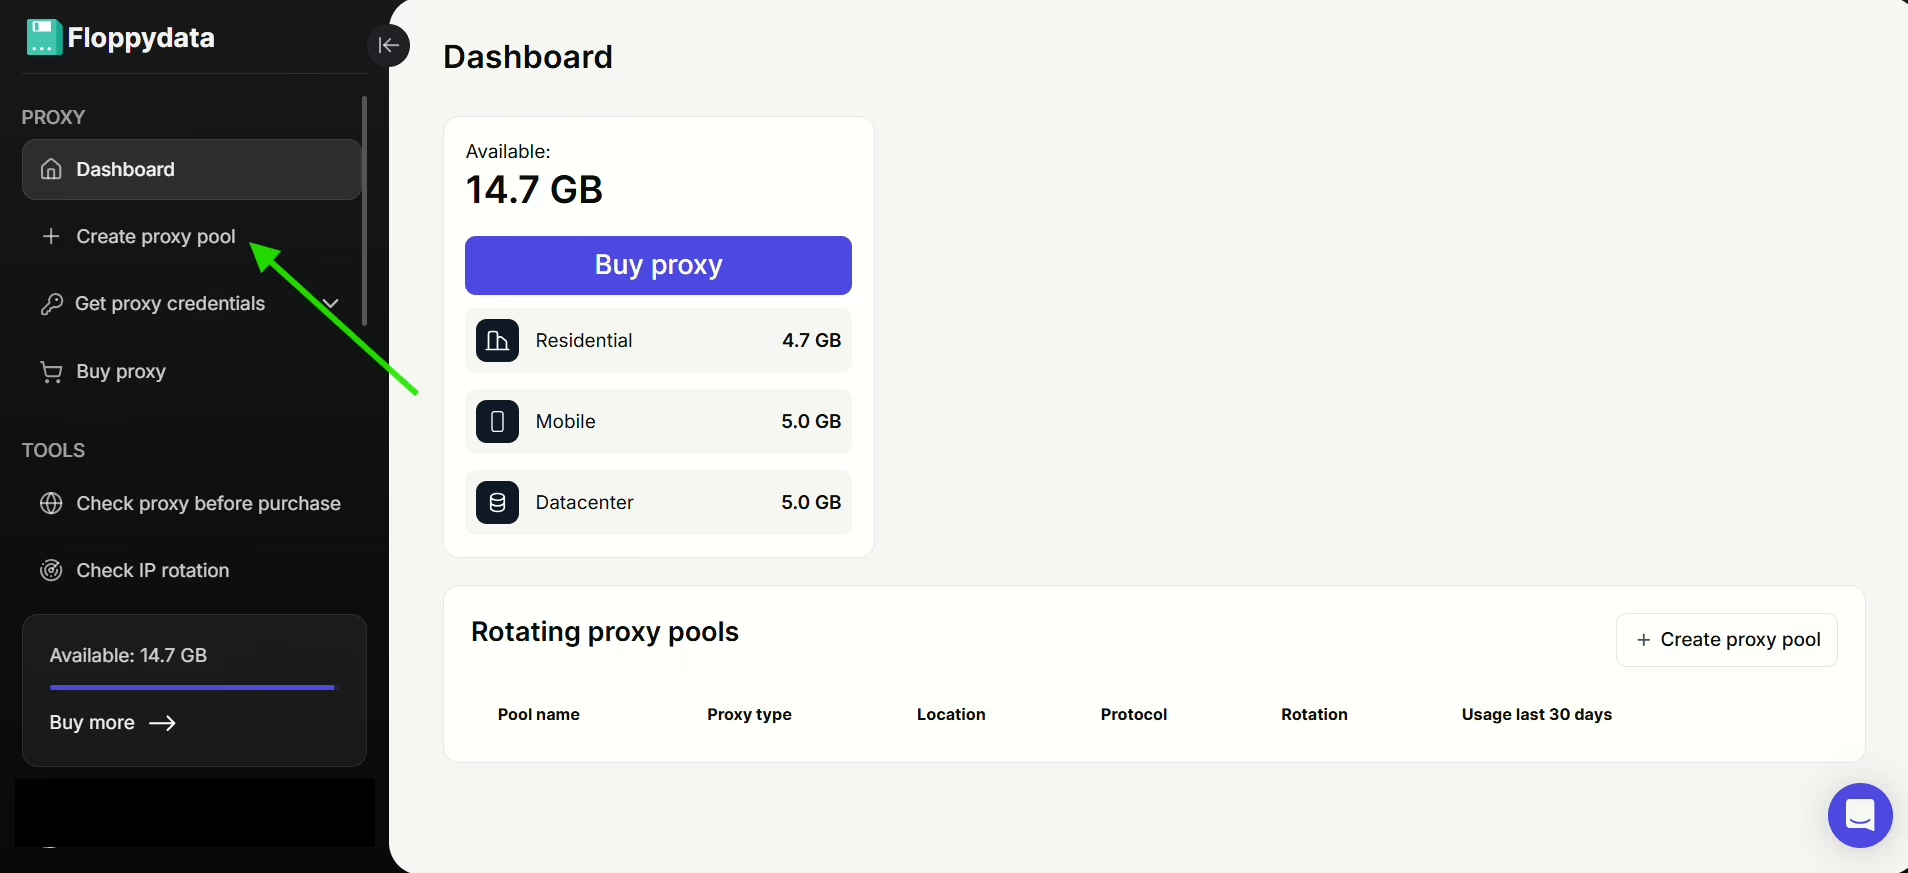
- Log into your Floppydata account
- Click on “Create proxy pool” from the left sidebar
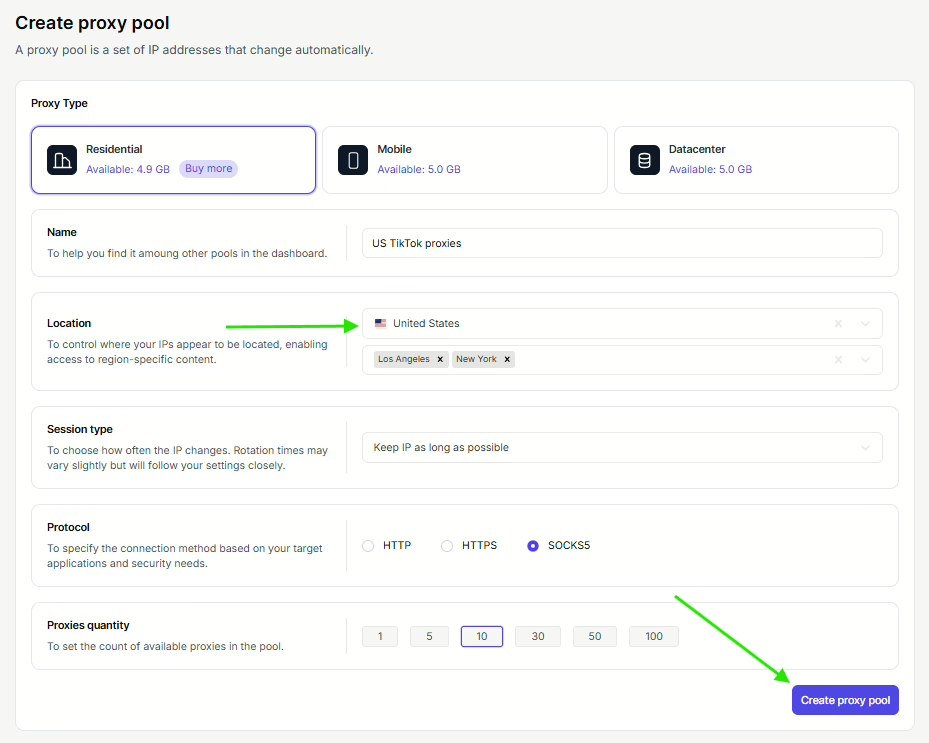
- Create your proxy list by filling in all the necessary details, and make sure you select the United States as your location. Click the Create proxy pool button to generate your proxies.
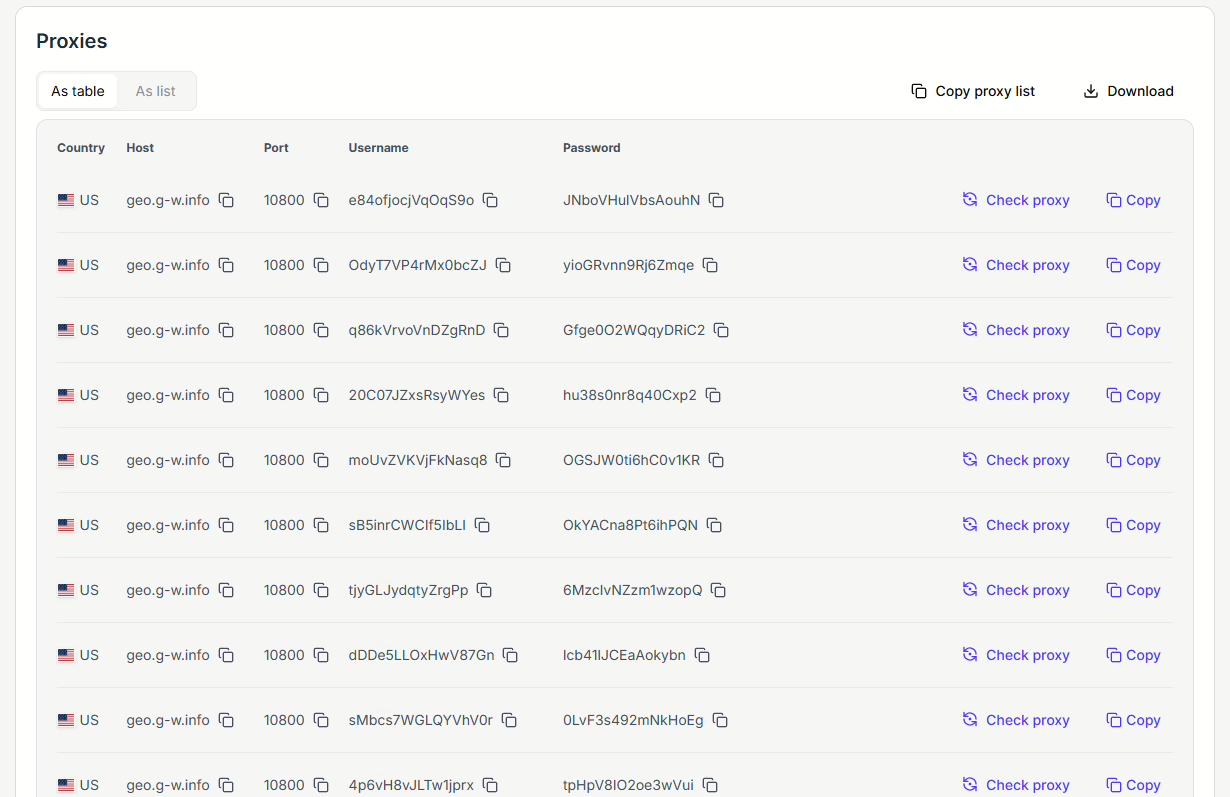
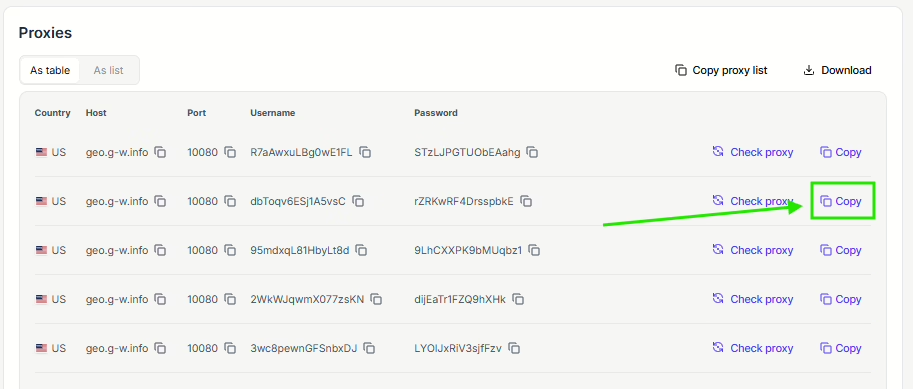
- Here’s my list of US proxies; yours should look something like this too:
Step 2: Use your proxies in your browser
Every proxy has its own Host, port, Username, and Password.
On Floppydata, you can find them on your proxy list, and you can easily copy them simply by clicking on the “copy” icon.
To set up your US proxy, it varies from browser to browser. Let’s find out how to do it for both Chrome and 1Browser:
1. Google Chrome: This browser doesn’t have a built-in proxy setting. You’ll need to set up your proxy inside your computer’s system settings.
To do so, go to your Chrome browser’s settings → System → Open your computer’s proxy settings.
That’s where you can paste your proxy’s port and host. When you click Save, the proxy will be activated.
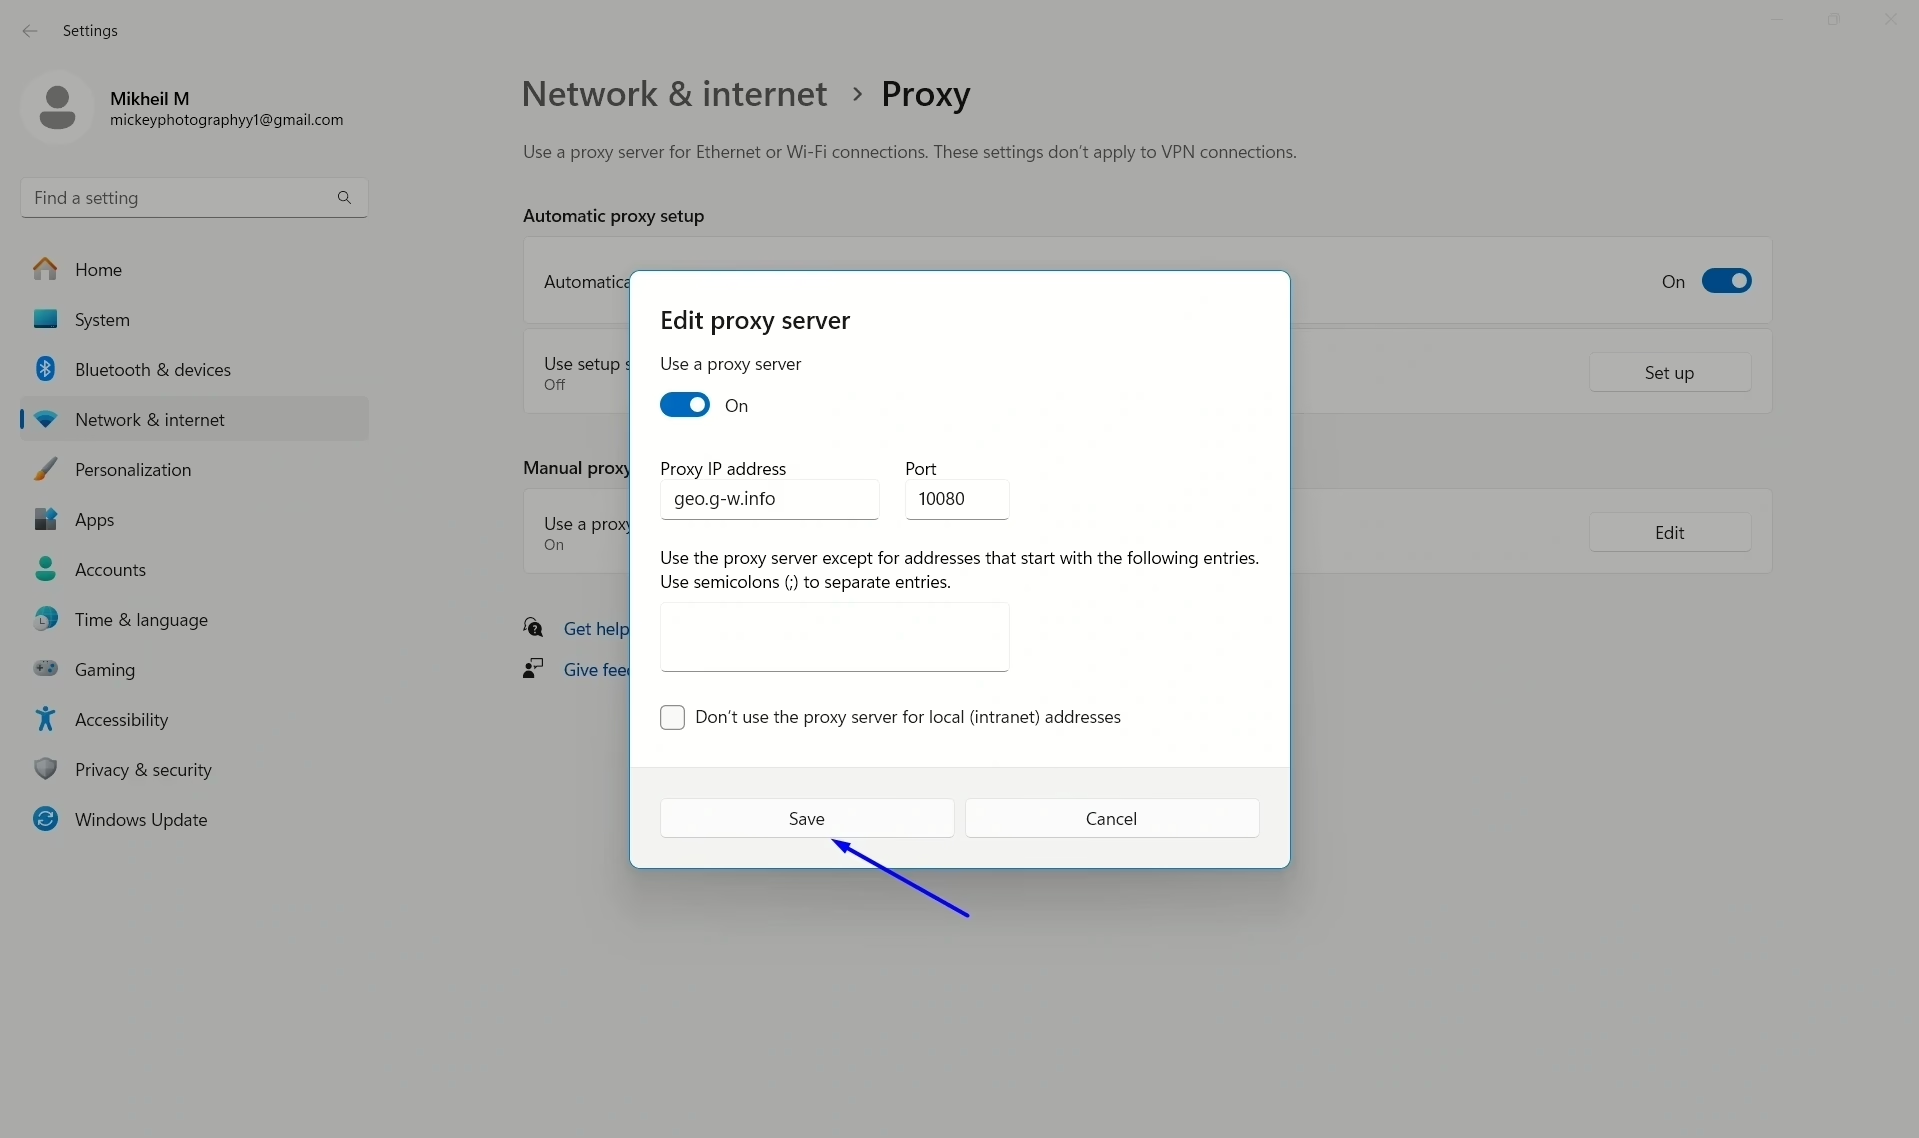
Note: When you open Chrome again, you’ll be asked to enter the username and password of the activated proxy, which are also provided among your proxy information in Floppydata.
All this might be a bit technical for some of you; that’s why I chose the second browser as an option, because it’s easier:
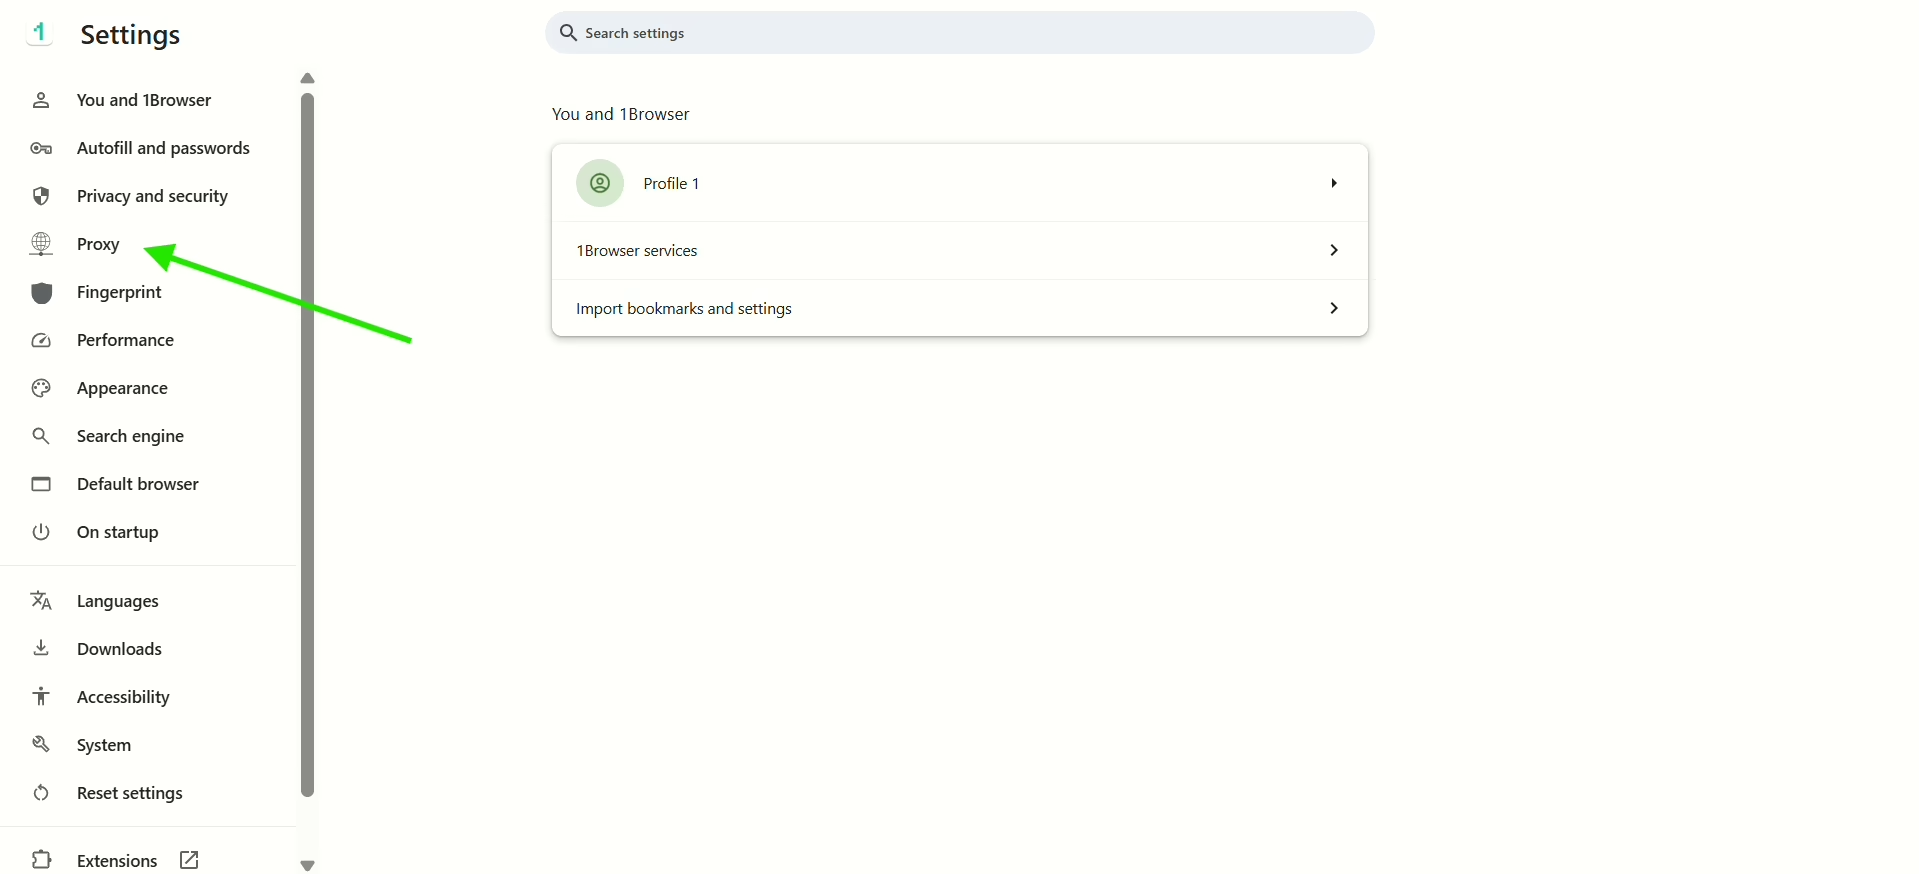
2. Use 1Browser: This is an anti-detect browser that not only easily accepts your Floppydata proxy, but also helps you stay more anonymous on the internet by masking your browsing fingerprint.
Just install it, go to its settings (just like you’d go if you were using Chrome), then click on Proxy from the left sidebar.
From your Floppydata list of proxies, choose a proxy and click on the copy button:
Then, back to 1Browser, choose the User proxy type and paste it into the input field in Proxy settings.
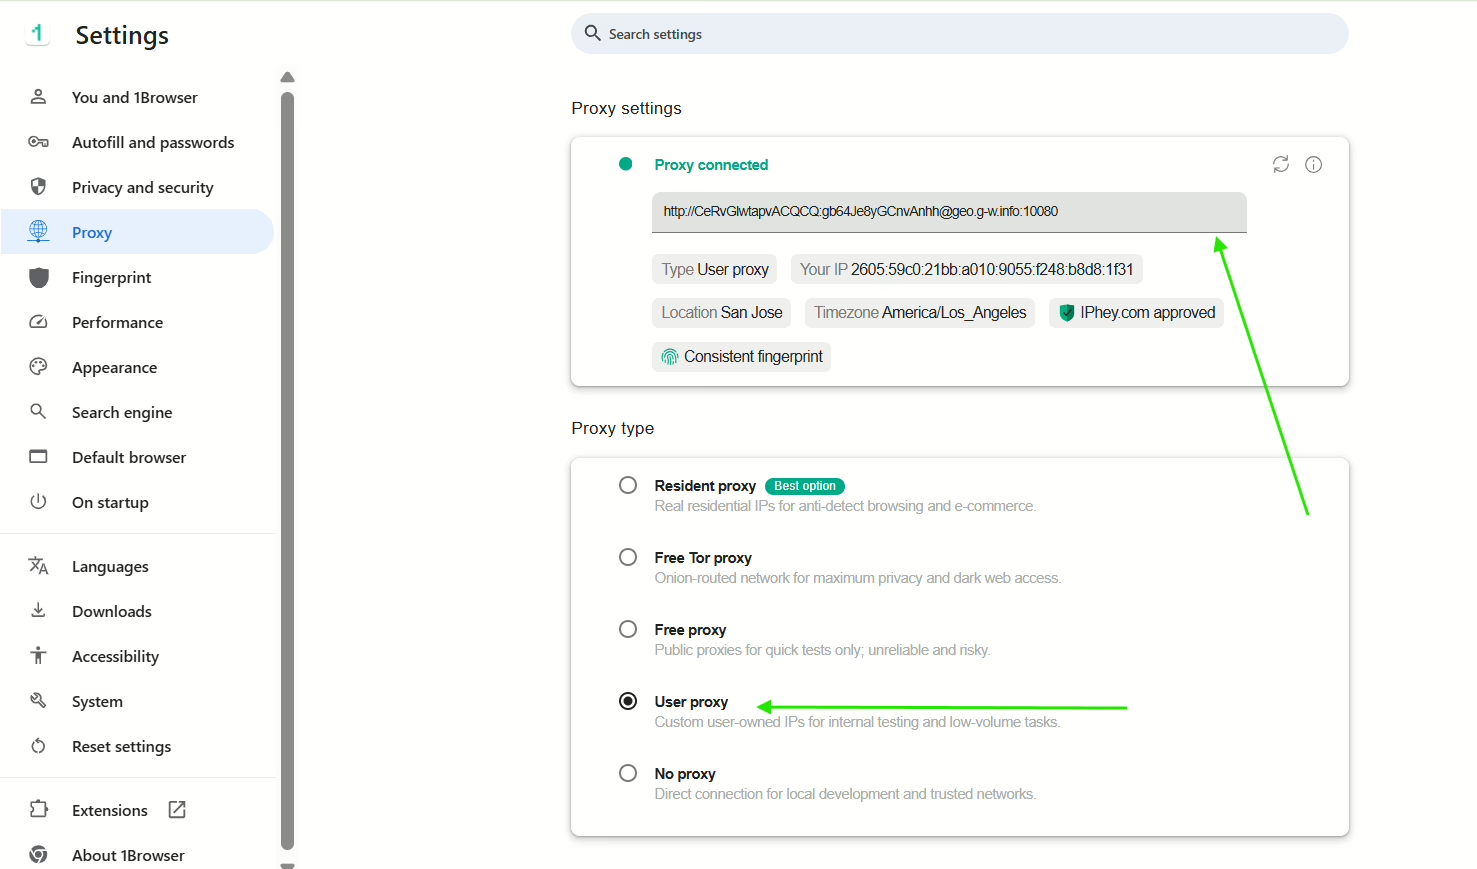
Once you see the green “proxy connected”, it means your proxy is now functional on the browser, and you can use it to access US TikTok successfully.
See how easy that was with 1Browser?
What if it were even easier? Let’s find out in Method 2:
Method 2: Get a US proxy directly on 1Browser
1Browser is both an anti-detect browser and a proxy browser, which has its own built-in proxies that you can activate in one click.
In the image below, we see that there are other options inside the “proxy type” box.
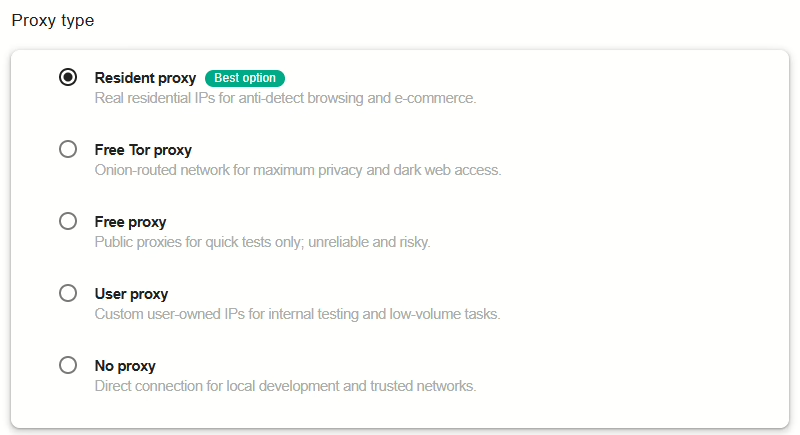
Each of them offers proxies provided by 1Browser, so there is no need for you to bring one from an external provider like Floppydata. You can just use 1Browser as both your browser and your proxy provider.
Pro tip: 1Browser allows you to open up to 10 profiles for free. So, if you manage multiple TikTok accounts, you can open each account in a separate profile with a separate 1Browser proxy IP, making you look like a totally different user for each account, which will help you avoid shadowbanning and account restrictions!
Example of using 1Browser’s built-in proxies to access TikTok US:
If you select Resident proxy, which is the most recommended proxy type, just choose the United States as your proxy country and wait for it to connect.
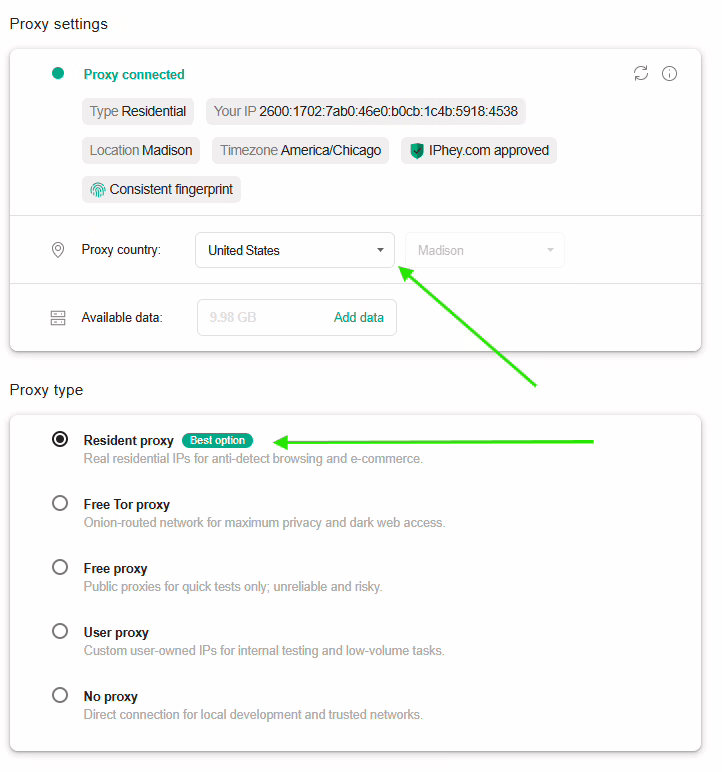
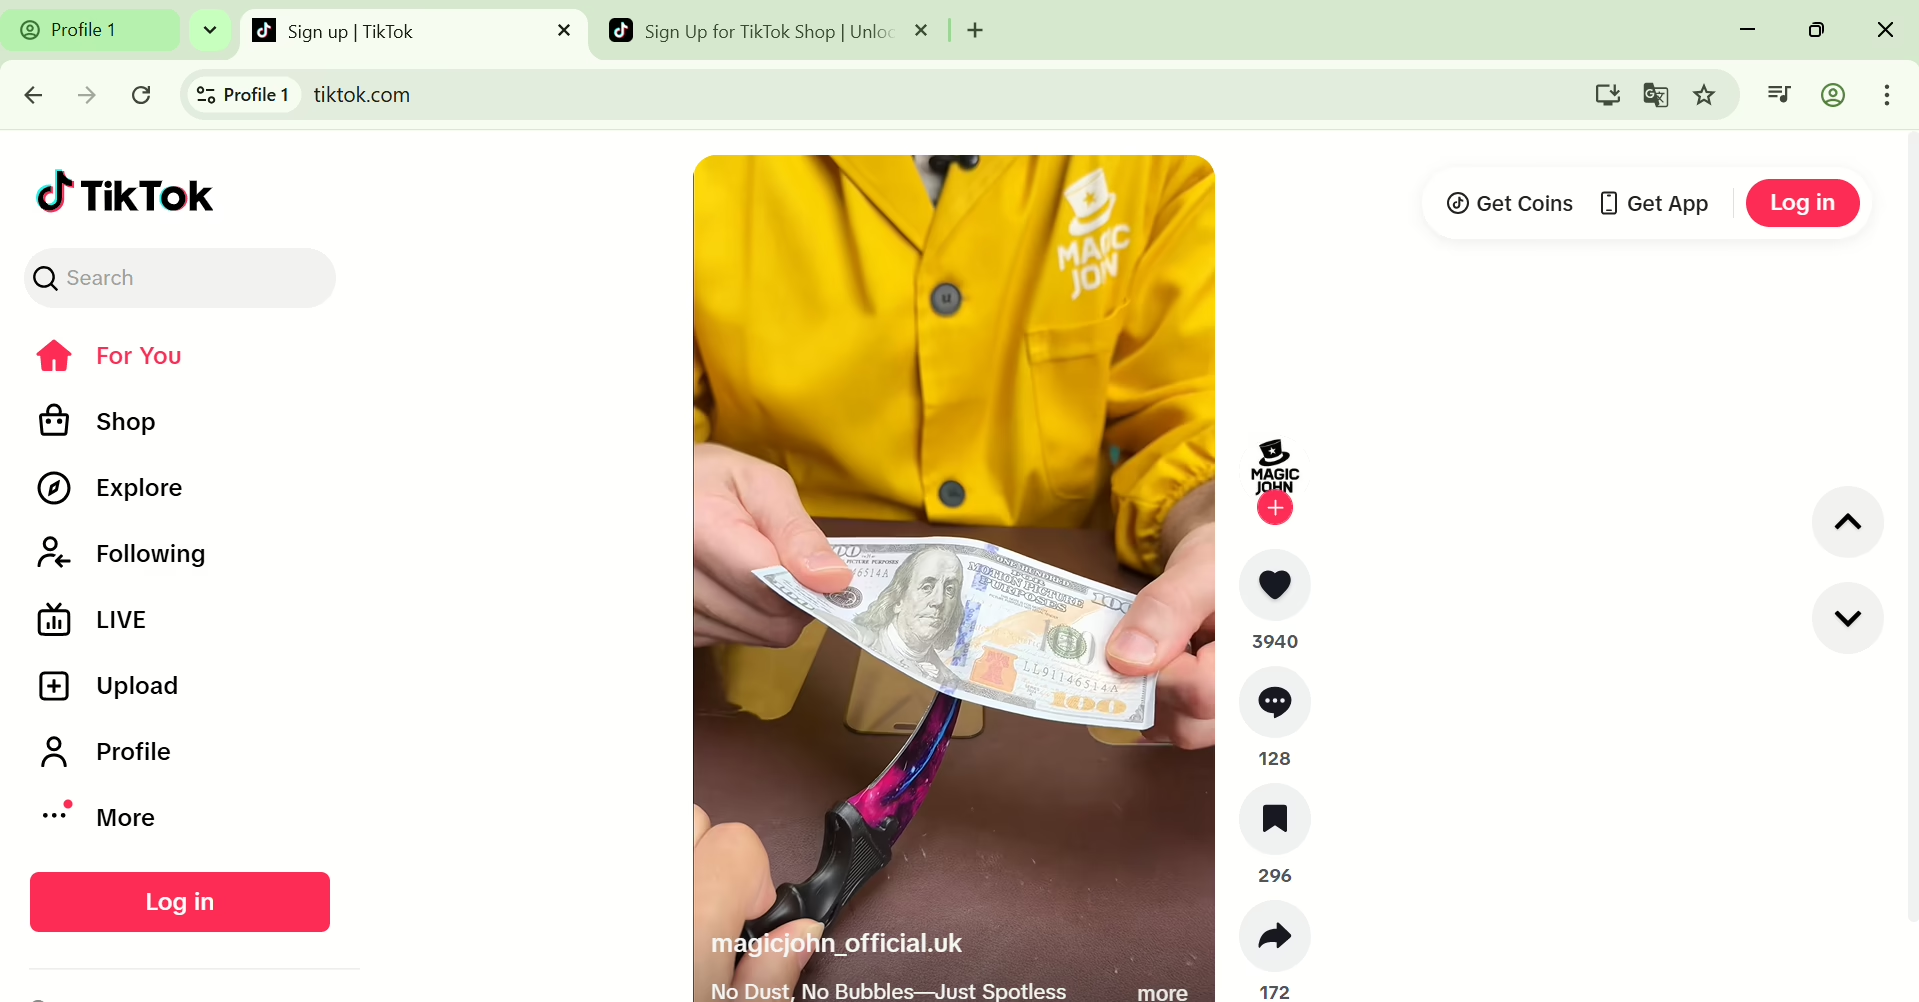
Once you see the green “proxy connected”, you can successfully connect to TikTok US, just like this:
Final Thoughts
Getting access to TikTok USA has many perks, and there are many ways to do so, too. In this guide, I explained how to do it with proxies.
The first method requires you to buy a US proxy from a provider first, then set it up on your browser.
The second method requires you to use only one tool: 1Browser, as both your proxy provider and your browser, where you can directly activate a proxy and start scrolling through TikTok US in seconds!
Download 1Browser today and open up to 10 profiles and use up to 5 proxies for free!